
Install an MTG R-Modem
In this guide
What You'll Need
Before you start, make sure you have all required hardware:
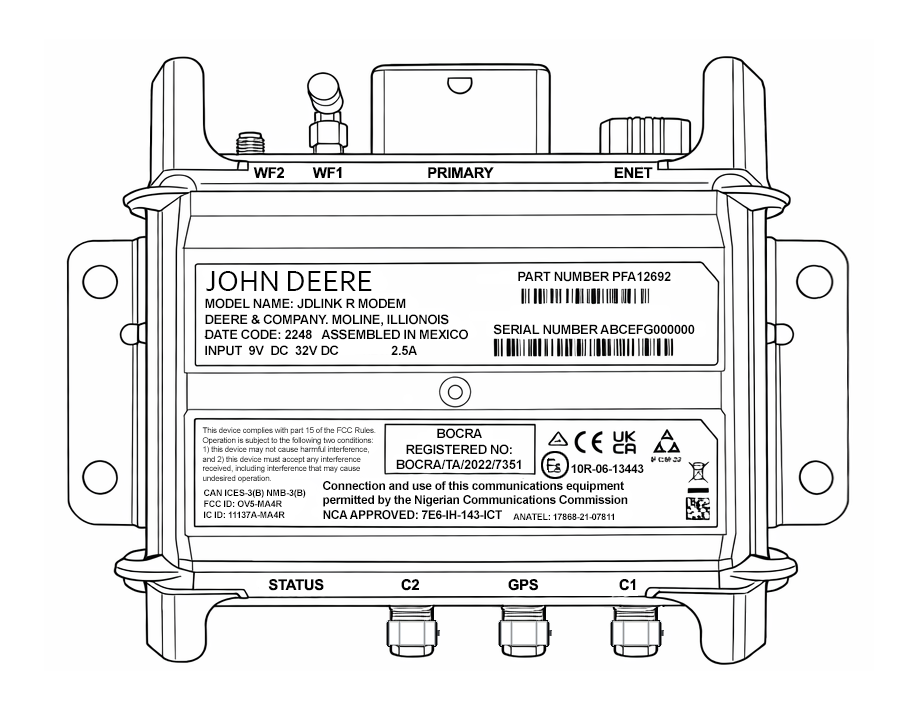
- MTG‑R modem (PFA12692)
- MTG wire harness
- R‑Modem antenna (PFA10891)
Step 1: Pre-Installation Setup
Before installing the modem, complete the MTG_VS Configuration Spreadsheet and send it to support@virtualsuper.com
Include the following information:
- MTG Serial Number
- Machinery or vehicle Make and Model
- Machinery or vehicle VIN
Note: Installation should not proceed until this information has been provided and you have received a confirmation email.
Step 2: Install the MTG R-Modem
To install the modem:
- Mount the R‑Modem antenna in a location with a clear view of the sky for GPS reception, then route the antenna cable to the modem's intended mounting location.
- Mount the MTG R‑Modem in a protected area inside the cab, away from dust, heat, and direct sunlight. We recommend installing it under the dashboard or inside or behind the glovebox.
Wire the DC power harness to the vehicle:
- Red (unswitched power): Connect to permanent DC vehicle power (9 V to 32 V accepted).
- Black (ground): Connect to a solid grounding point. For example, under a screw head or bolt that is connected directly to the chassis.
- Red (switched power): Connect to ignition‑switched power.
Connect the power harness to the modem Primary port. The socket is accepted only one way.
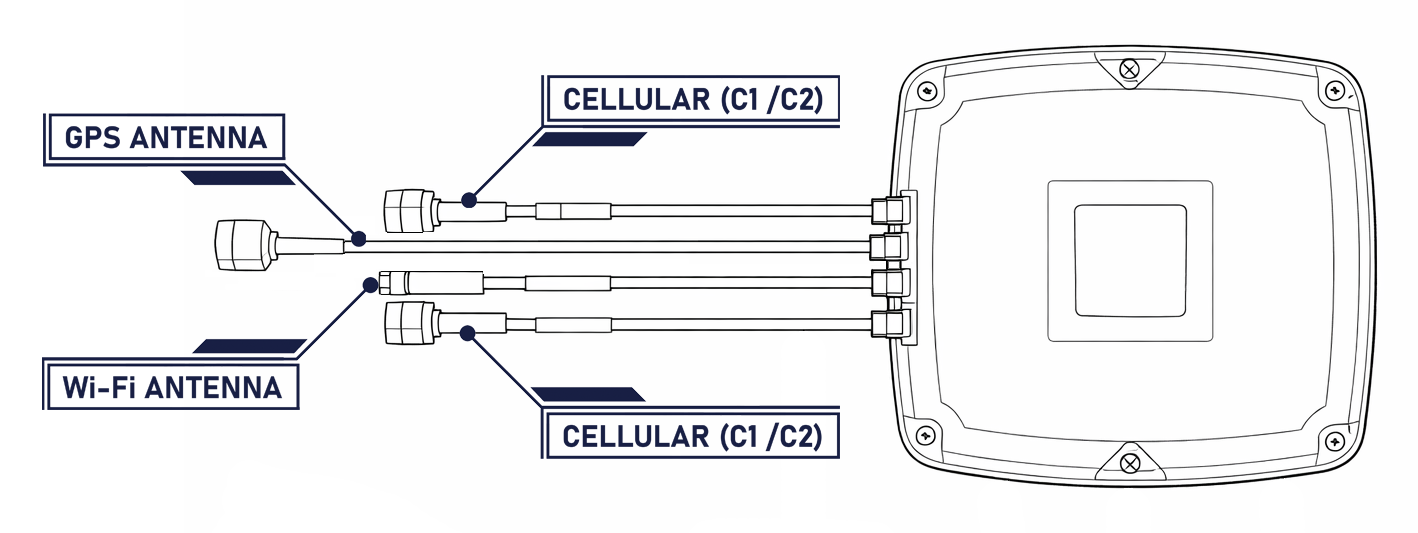
Next, connect the R‑Modem antenna to the modem:
- Connect the cellular cables to the C1 and C2 bayonet ports.
- Connect the GPS cable to the GPS bayonet port.
-
Connect the Wi‑Fi cable to either Wi‑Fi port (labelled WF1 and WF2).
 Click or tap to expand image
Once installed, start the vehicle and allow it to idle for 5–10 minutes so the modem can register on the cellular network.
Use the LED status lights to determine the health of this connection (LED status indicators are described in the following section).
Step 3: Verify Modem Status (LED Indicators)
Check the modem’s LED display to confirm correct operation.
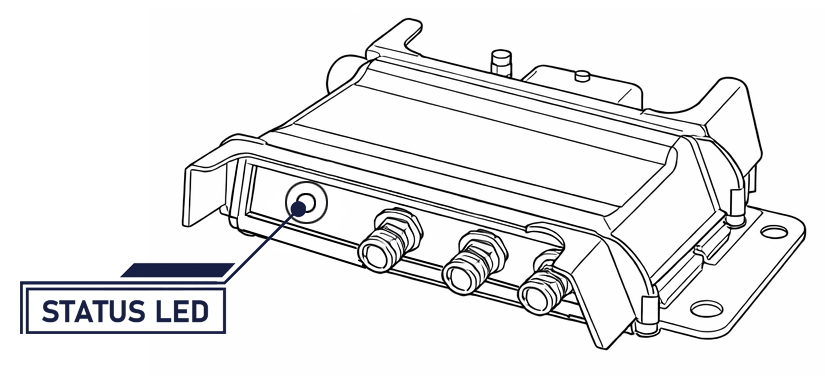
During Boot‑Up
| LED Color | Meaning |
|
Off
|
Device is off or disconnected
|
|
Amber
|
Device and application are booting
|
|
Flashing Amber
|
Boot completed successfully
|
|
White
|
Device is powering down
|
|
Red
|
Error condition
|
After Successful Boot
| LED Color | Meaning |
|
Blue
|
Valid GPS fix acquired
|
|
Green
|
Connected to cellular network
|
|
Magenta
|
Connected to a Wi‑Fi network
|
|
White
|
Connected to Virtual Superintendent
|
Installation Complete
Once the LED indicators confirm GPS, cellular, and Virtual Superintendent connectivity, the installation is complete.
If the modem does not reach a connected state after 10 minutes, contact Virtual Superintendent support for assistance.