
The All Reports Page
Use the All Reports page to create and manage reports, share reports with other users or email them to other users, view reports that have been shared with you or emailed to you, and save frequently used reports as favorites.
In this article
Open the All Reports Page
- Sign in to Virtual Superintendent.
- Click Menu > All Reports. The All Reports page opens.
- Use the menu on the left to view or create reports. Click a report in the right panel to open.
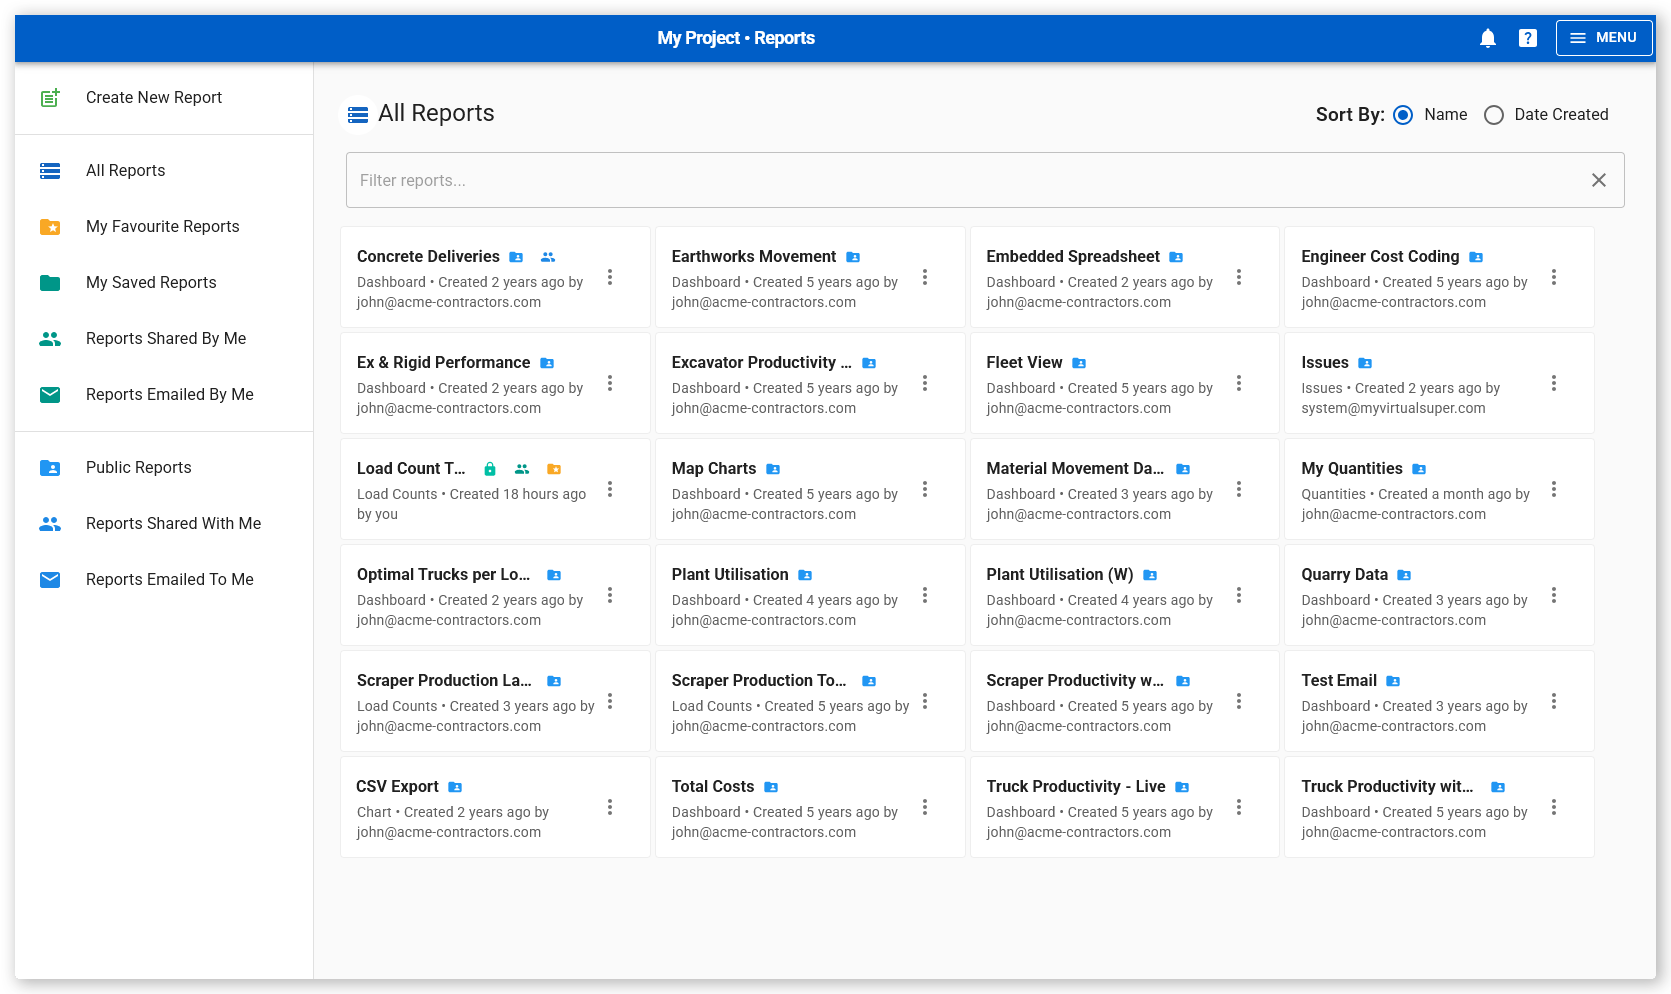
Note: The All Reports main menu option opens the Reports page with the left All Reports menu item selected and open. Likewise, the Issues main menu option opens the Reports page with the Issues report selected and open.
Reports Page Menu Options
The menu on the left of the Reports page includes the following options:
| Menu Options | Icon | Description |
| Create New Report |
|
Create a new report. |
| All Reports |
|
View all reports available to you. |
| My Favorite Reports |
|
View your favorite reports. |
| My Saved Reports |
|
View reports that you created and own. |
| Reports Shared By Me |
|
View reports you shared with other users. |
| Reports Emailed By Me |
|
View reports you emailed to other users. |
| Public Reports |
|
View reports configured as public within your project. |
| Reports Shared With Me |
|
View reports shared with you by other users. |
| Reports Emailed To Me |
|
View reports emailed to you. |


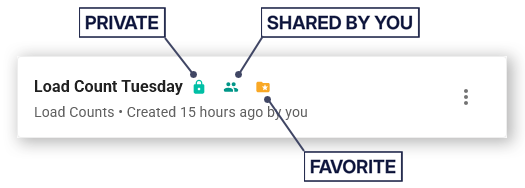
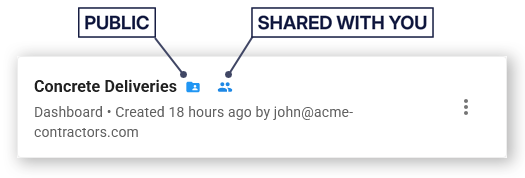
Individual reports also use these icons to indicate their status and ownership. They use:
- Green icons to identify reports that you created and own.
- Blue icons to identify reports created and owned by another user, but that you can view (because they are set as public, or because they have been shared with you or emailed to you).
- Green padlock icons to indicate that a report was created and owned by you and that it is set as private. These can still be used by others if you share them or email them to others, but only you can edit or manage them.
Filter Reports
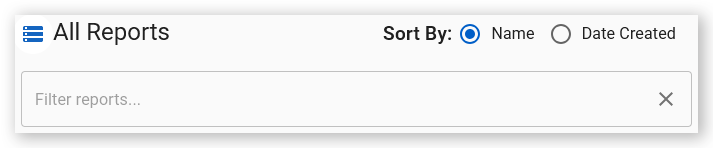
Use the text field at the top of the page to filter reports by name, and the radio buttons to sort reports alphabetically by name (Name) or in descending order by creation date (Date Created) with the newest at the top.
Rename a Report
Reports can be renamed if they contain a mistake or if the report has been updated to describe different data:
To rename a report:
- Click the three-dot menu to the right of the report name. A contextual menu opens.
- Click Rename. The Edit Report Name dialog opens.
- Type a new report name into the Report Name field.
- Click Save. The report name is updated.
Note: You can only rename reports that you created and own.
Make a Report Public or Private
By default, new reports are set as private. This means that only their creators can see or use them, unless they are shared with users or emailed.
If the report is set to public, everyone in the project can see, use and share the report but only its creator can edit it or make it private again.
Note: To share the report with specific users, without making it public, you can also share it.
To make a private report public:
- Click the three-dot menu to the right of the report name. A contextual menu opens.
- Click Make Public. The Make Report Public dialog opens.
- Click Make Public. The report is made public and added under the Public Reports menu.
To make a public report private:
- Click the three-dot menu to the right of the report name. A contextual menu opens.
- Click Make Private. The Make Report Private dialog opens.
- Click Make Private. The report is made private and removed from the Public Reports menu. If the report is still being shared with other users or was emailed to other users, the report remains under your Reports Shared By Me or Reports Emailed By Me menus and under the Reports Shared With Me or Reports Emailed To Me for those you shared it with.
Note: You can only change the privacy settings of reports that you created and own.
Make a Report a Favorite
If a report is used frequently, it can be saved as a favorite and located quickly under My Favorite Reports.
To add a report as a favorite:
- Click the three-dot menu to the right of the report name. A contextual menu opens.
- Click Add Favorite. The report is added as a favorite under the My Favorite Reports menu.
Share a Report
A report can be shared with another Virtual Superintendent user if it contains information of interest.
To share a report with a user:
- Click the three-dot menu to the right of the report name. A contextual menu opens.
- Click Share with user(s). The Share Report dialog opens.
- Check the box beside each user you want to share the report with. As you add users, they are added to the top section of the dialog. You can also filter users by name by typing into the top Filter users field.
- Click Share. The report is shared with the selected users. If the report is yours (that is, it was created by you) and private, it is also added under the Reports Shared By Me menu. Private reports that have been shared have a green Shared icon beside the report name while public reports that are shared have a blue Shared icon.
Email a Report Every Day
If a report contains information that updates every day, the report can be automatically emailed to a user or group of users daily. This ensures that the report is provided every day but does not require users to sign in.
Note: When a report is emailed, it is attached to the email in PNG image format. These emails also include a link to view the report in Virtual Superintendent where it can be downloaded in PDF format.
To schedule a daily report email:
- Click the three-dot menu to the right of the report name. A contextual menu opens.
- Click Daily Email to user(s). The Email Report dialog opens.
- Check the box beside each user you want to be emailed the report. As you add users, they are added to the top section of the dialog. You can also filter users by name by typing into the top Filter users field.
- Click Save. The report is emailed to the selected users once a day until they are removed by reopening the list and deselecting them. If the report is owned by you, it is also added under the Reports Emailed By Me menu.
Email a Report Immediately
A report can be emailed to a user or group of users if it contains information of interest or information that should be acted on immediately.
Note: When a report is emailed, it is attached to the email in PNG image format. These emails also include a link to view the report in Virtual Superintendent where it can be downloaded in PDF format.
To email a report:
- Click the three-dot menu to the right of the report name. A contextual menu opens.
- Click Email now to user(s). The Email Report Now dialog opens.
- Check the box beside each user you want to be emailed the report. As you add users, they are added to the top section of the dialog. You can also filter users by name by typing into the top Filter users field.
- Click Save. The report is emailed to the selected users immediately.
Archive a Report
If a report is no longer needed, it can be archived. This does not delete the report but removes it from the Virtual Superintendent interface.
Note: To restore the report, contact customer support at support@virtualsuper.com with the report name and the archive date.
To archive a report:
- Click the three-dot menu to the right of the report name. A contextual menu opens.
- Click Archive. The Archive Report dialog opens.
- Click Archive. The report is archived and removed from the Reports page.