
Bulk Import Dockets Using an Excel Spreadsheet
If you are a Head Contractor or Subcontractor Administrator and need to create multiple dockets efficiently, you can use the Excel import feature to import and generate dockets in bulk.
This feature is useful when working with large volumes of similar dockets, importing data from external systems, or creating dockets on behalf of subcontractors.
In this article
Permissions
Before dockets can be imported in bulk, the import option must be enabled on the supplier from the Suppliers page (Menu > Suppliers). To access the Suppliers page, you must have one of the following permissions:
- Admin Manager
- Dockets Super User
Users with Admin Manager or Dockets Super User permissions can also import dockets for any supplier. All other users, including Subcontractor Admin users, can import dockets only for their own organization (if importing is enabled on their owner supplier).
Note: Once bulk import is enabled for a supplier, the import option becomes available from the relevant Dockets pages (for example, Menu > Admin or Menu > Super User) for all users with access.
Enable Docket Importing on a Supplier
- Sign in to Virtual Superintendent.
- Click Menu > Suppliers. The Suppliers page opens.
- Select a supplier from the list. The Edit Supplier dialog opens.
- On the General tab, locate the Bulk Import Enabled dropdown and select Yes.
- Click Save. Bulk docket importing is now enabled for the selected supplier.
Download the Dockets Excel Template
To download the template file:
- Sign in to Virtual Superintendent.
- Open the relevant dockets page. For example, Menu > Admin or Menu > Super User.
-
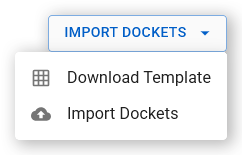
Click Import Dockets. A contextual menu opens.
 Click or tap to expand image
 -
Click Download Template.
- If you are a Head Contractor with Admin Manager or Dockets Super User permissions, select a Supplier from the dropdown, then click Select. The template downloads to your computer in .xlsx format using the file name format
vs_Docket Import Template [Selected Supplier Name]_YYMMDD-HHMMSS. - If you aren't a Head Contractor, the template downloads to your computer in .xlsx format using the file name format
vs_Docket Import Template_YYMMDD-HHMMSS.
- If you are a Head Contractor with Admin Manager or Dockets Super User permissions, select a Supplier from the dropdown, then click Select. The template downloads to your computer in .xlsx format using the file name format
- Open the downloaded file and enter the details of each new docket (see the tables below for required and optional fields). Each row represents a single docket. Once complete, save the file and upload it using the Import Dockets option.
Required Fields
The following fields must be completed for each docket:
| Field | Description | Validation Rules |
| Date | Date of the work or delivery |
Required; must be a valid date; must not be in the future
|
| Chargeable Item | Item being billed; also known as an Item Code |
Required; must match an existing item; select a valid item from the dropdown
|
| Billable Quantity | Quantity billed after breaks. This field reflects the UOM (Unit of Measure) for the selected billable item, for example hours for labor or tons for material |
Required; must be a valid numeric value matching the item’s unit of measure
|
| Supervisor | Supervisor responsible for the work |
Required; must match an existing user; select a valid user from the dropdown
|
Optional Fields
The following fields can be used to provide additional docket information:
| Field | Description | Validation Rules |
| Invoice Number | Used to filter dockets |
Optional; free text
|
| Cost Code | Assign cost code to docket |
Must match an existing cost code; select a valid cost code from the dropdown
|
| Start Time | Shift start time (hours-based dockets) |
Optional; defaults to 7:00 AM if not provided
|
| Apply Breaks | Apply supplier breaks |
Yes or No
|
| Engineer | Assign engineer |
Must match an existing user; select a valid user from the dropdown
|
| Plant ID | Plant reference |
Must match an existing plant asset; select a valid asset from the dropdown
|
| Location | Work or delivery location |
Must match an existing location; select a valid location from the dropdown
|
| Docket Unifier | Combine rows into one docket |
Optional; used for combining
|
| People | Worker names |
Optional; select valid users from the dropdown
|
| Order Number | Related order |
Optional; must match if provided
|
| Ticket Number | Ticket reference | Optional; free text |
| Remarks | Additional notes | Optional; free text |
Note: The Billable Quantity must reflect the unit of measure for the selected chargeable item. For example, labor dockets should use hours, while material dockets should use tons. For hours-based dockets, enter billable hours only and do not include break time.
The Apply Breaks field determines whether supplier breaks are automatically applied. Selecting Yes results in breaks being applied if they fall within the shift, while selecting No means breaks are not applied. When breaks are applied, the finish time is automatically adjusted.
If a Start Time is not provided, the system automatically defaults to 7:00 AM.
The Docket Unifier field allows multiple rows to be combined into a single docket. Rows are combined when the following values match: Date, Invoice Number, Cost Code, Supervisor, Engineer, Location, Order Number, and Ticket Number. Rows can also be combined automatically by selecting the Combine dockets option during the import process.
For best results, we recommend that you:
- Download the Excel template each time you begin the import process. Virtual Superintendent may update the template at any time, and using the latest version helps prevent errors.
- Use dropdown lists where available.
- Ensure quantities match the correct unit of measure.
- Copy and paste data carefully to avoid formatting issues.
- Start with a small test upload before importing large datasets.
- Save the template regularly to avoid losing changes.
Tip: If you are importing many dockets, consider splitting the file into smaller batches to make troubleshooting easier if errors occur.
Import an Edited Excel Template
To import an edited Excel template file to create dockets in bulk:
- Sign in to Virtual Superintendent.
- Open the relevant Dockets page. For example, Menu > Admin or Menu > Super User.
-
Click Import Dockets. A contextual menu opens.
Click or tap to expand image -
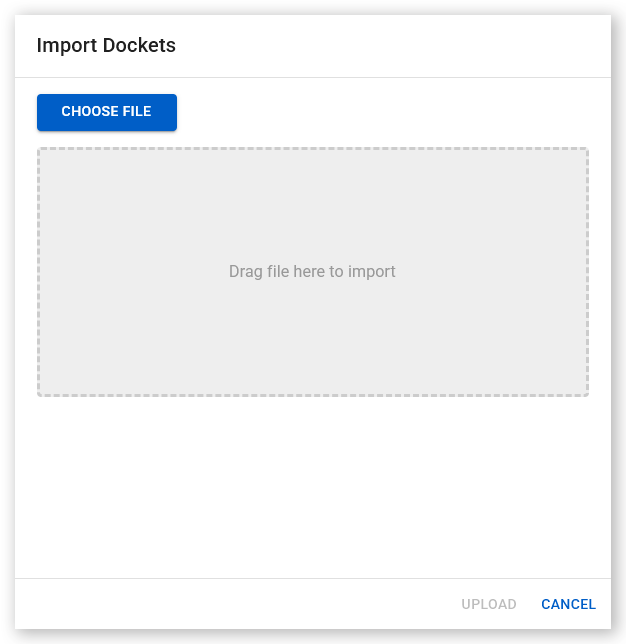
Click Import Dockets. The Import Dockets dialog opens.
 Click or tap to expand image
 - Click Choose File to open your file explorer, select the import file, and click Open. Alternatively, drag and drop the import file into the Drag file here to import area. Supported file formats are .xlsx and .csv.
-
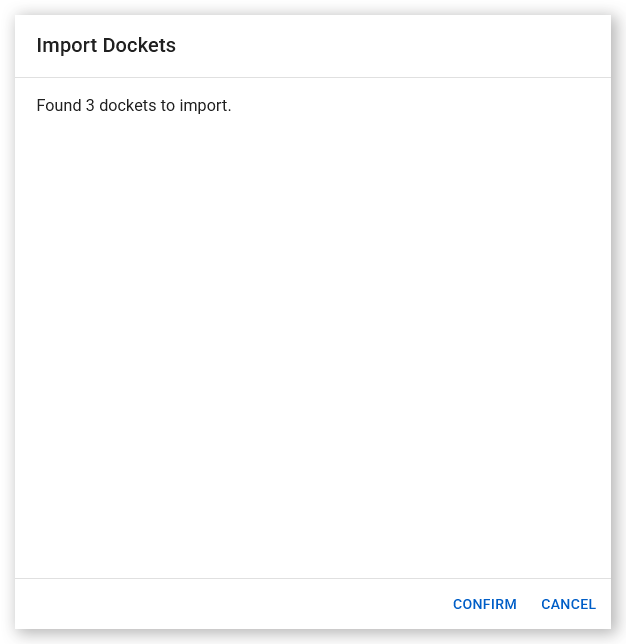
Click Upload. Virtual Superintendent uploads and validates the file. A preview showing the number of dockets to be imported is displayed. If any rows fail validation, a red text alert shows the number of errors found. Click Expand to view each error, including the issue and the affected row. Correct the errors in your file and try again.
 Click or tap to expand image
 -
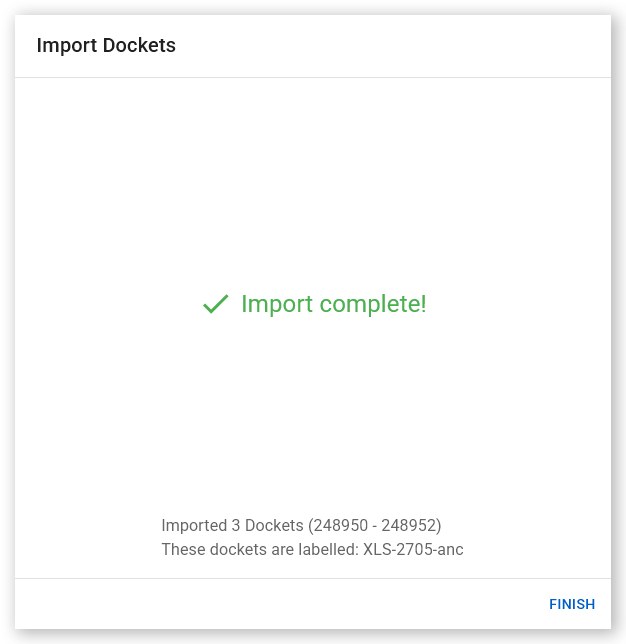
Click Confirm. New dockets are created for all valid rows, and a summary displays the total number of dockets created.
 Click or tap to expand image
 - Click Finish to complete the process.
Note: If dockets are imported with matching values for date, cost code, supervisor, engineer, invoice number, or location, you will be prompted to choose whether to combine them into a single docket.
Video Guide
Watch this video to see a demonstration of the docket import process: