Add Labels to a Docket
Labels help users organize, manage, and filter dockets in Virtual Superintendent. Most docket users can add and remove labels, while only Head Contractors with Admin Manager permissions and users with Dockets Super User permissions can create and edit labels.
In this article
Who Can Use Labels
Different roles can use labels as follows:
| User Role | Create/Edit Labels | Add/Remove Labels | Filter by Labels |
| Head Contractor (with Admin Manager permissions) | ✔ | ✔ | ✔ |
| Super Users | ✔ | ✔ | ✔ |
| Supervisors |
|
✔ | ✔ |
| Engineers |
|
✔ | ✔ |
| Dockets Admins |
|
✔ | ✔ |
| Subcontractor Admins |
|
|
✔ |
Note: Subcontractor Administrator users have only read‑only access for filtering purposes. They cannot create, edit, or remove labels.
Permissions
To access the Dockets Setup page (Menu > Dockets Setup) and create or edit labels, you must have one of the following permissions:
- Admin Manager
- Dockets Super User
Create Labels
To create a label in Virtual Superintendent:
- Sign in to Virtual Superintendent.
- Click Menu > Dockets Setup. The Dockets Setup page opens.
- Select the Labels tab.
- Click Add Label. The Add Label dialog opens.
- Type a label name into the Label field.
- Click the color icon in the Color field and choose from the available options. Alternatively, type a custom color by pasting a hex color code into the text field.
- Click Save. The new label is now available for use on dockets.
Edit an Existing Label
To edit an existing label:
- Sign in to Virtual Superintendent.
- Click Menu > Dockets Setup. The Dockets Setup page opens.
- Select the Labels tab.
- Click the label you want to edit in the grid. The Edit Label dialog opens.
- Update the label name or color details as needed.
- Click Save to apply your changes.
Manually Add Labels to a Docket
To add labels to a single docket:
- Sign in to Virtual Superintendent.
- Open the dockets page that matches your account permissions. These are listed under the Dockets section of the menu (for example, Menu > Admin or Menu > Super User).
- Click an existing docket in the grid. The Edit Docket dialog opens.
- In the dialog title bar, click the Add (+) button to open the label list.
- Select one or more labels from the list.
- Click Apply to close the list.
- Click Save to confirm your changes and apply the labels to the docket.
This video demonstrates how to add labels to your dockets:
Remove a Label from a Docket
If a label has been applied to a docket incorrectly, you can remove it as follows:
- Sign in to Virtual Superintendent.
- Open the dockets page that matches your account permissions. These are listed under the Dockets section of the menu (for example, Menu > Admin or Menu > Super User).
- Click an existing docket in the grid to open the Edit Docket dialog.
- In the docket title bar, click the three-dot menu on the label you want to remove.
- Select Remove to delete the label, then close the docket. The label is removed immediately. You do not need to save the docket.
Bulk Add and Edit Labels
To save processing time, you can bulk add or remove labels from multiple dockets at once.
- Sign in to Virtual Superintendent.
- Open the dockets page that matches your account permissions. These are listed under the Dockets section of the menu (for example, Menu > Admin or Menu > Super User).
- From the Dockets page, filter and select the dockets you want to update using the checkboxes beside each docket you want to edit.
- Click Bulk Actions to open the bulk actions menu.
- Select Edit Labels to open the Add or Remove Labels panel.
- Select or deselect the labels you want to apply or remove.
- Click Apply at the bottom of the panel to start the bulk update.
Bulk processing status
After you click Apply, the Processing Tasks panel appears on the right side of the Dockets page.
- Processing may take several minutes if many dockets are selected.
- You can leave the Dockets page and continue working while the task runs.
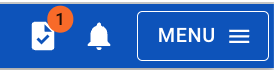
- When processing is complete, a notification appears on the Processing Tasks icon next to the menu.
Click the notification icon to view the details of the completed bulk edit task.
Click or tap to expand image
This video demonstrates how to bulk edit labels:
Filter by Labels
When filtering dockets by labels, several options control how the filter behaves.
| Filter Option | Description |
|
Default (Any)
|
When multiple labels are selected, dockets only need to have one of the selected labels applied to appear in the results.
|
| And |
Displays only dockets that contain all of the selected labels.
|
| System |
Filters imported dockets. System labels are automatically applied when dockets are imported using the Excel import option.
|
| No Labels |
Displays dockets that have no labels applied, helping you identify dockets that still need to be labeled.
|
System label example
An example of a system‑generated label:
VS XLS‑0610‑AKL
The individual components of the label represent:
- VS - Virtual Superintendent
- XLS - Excel file import
- 0610 - Date the docket was generated (10 June)
- AKL - A random identifier that ensures the label is unique
This video demonstrates how to filter by No Labels: