
Delete and Restore Dockets
Deleting a docket removes it from standard docket views and search results and, unlike archived dockets, data in deleted dockets is not used by Virtual Superintendent for internal calculations and analytics.
Deleting dockets also improves system performance, especially when managing many dockets, because deleted dockets no longer appear in dockets lists by default. This can significantly reduce page loading times.
You can delete and restore dockets at any time, either individually or in bulk.
Note: You can also archive and unarchive dockets. See the Archive and Unarchive Dockets help article for more information.
In this article
Permissions
To delete and restore dockets, you must have the following permissions:
- Dockets Super User
Note: Dockets users without Dockets Super User permissions, including users with Subcontractor Admin rights, cannot delete or restore dockets, but they can view dockets deleted by others by selecting Display Options > Show Deleted on their respective Dockets pages.
View Deleted Dockets
To see deleted dockets on your dockets page:
- Sign in to Virtual Superintendent.
- Click Menu > Super User. The Dockets page opens. You might be asked to choose a pre-filter setting before dockets are shown.
-
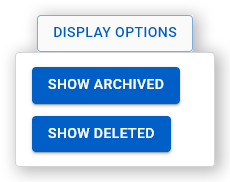
Click Display Options. A contextual menu opens.
 Click or tap to expand image
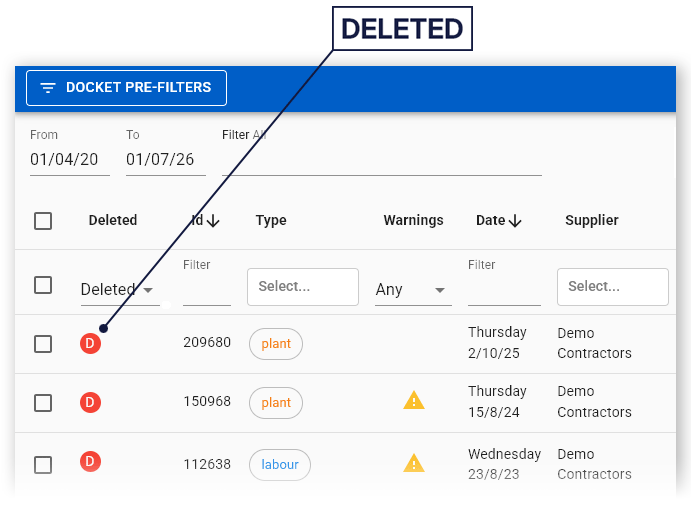
 - Click Show Deleted. The Deleted column filter updates to show only deleted dockets.
Note: To restore the default docket view, click Display Options again and select Hide Deleted.
Delete Dockets
Delete individual dockets
To delete dockets individually:
- Sign in to Virtual Superintendent.
- Click Menu > Super User. The Dockets page opens. You might be asked to choose a pre-filter setting before dockets are shown.
-
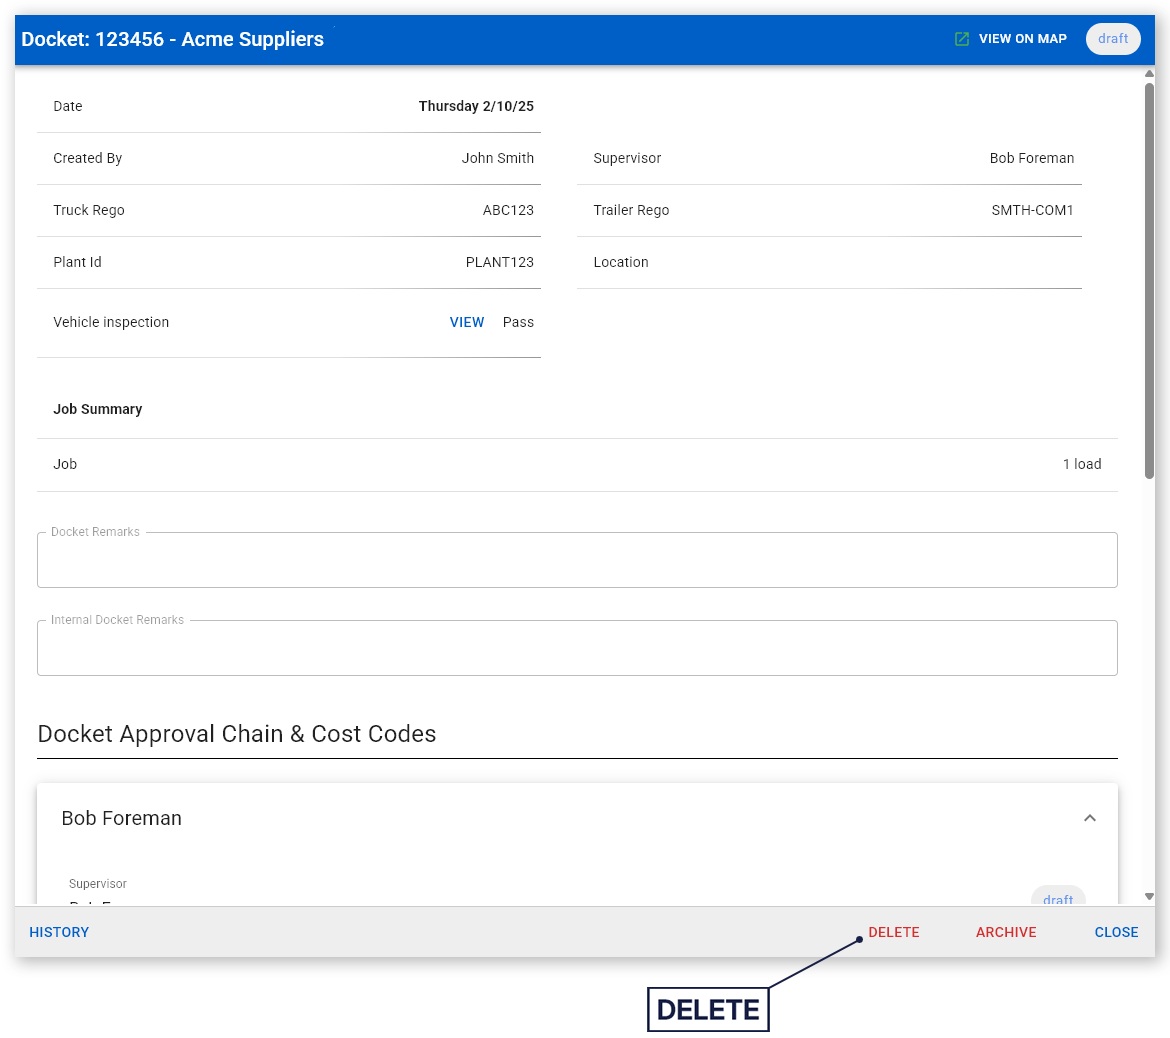
Locate and select the docket you want to delete. The Edit Docket dialog opens.
 Click or tap to expand image
 -
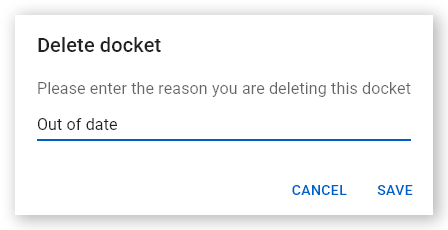
Click Delete. The Delete Docket dialog opens.
 Click or tap to expand image
 - Type the reason for the docket deletion into the text field.
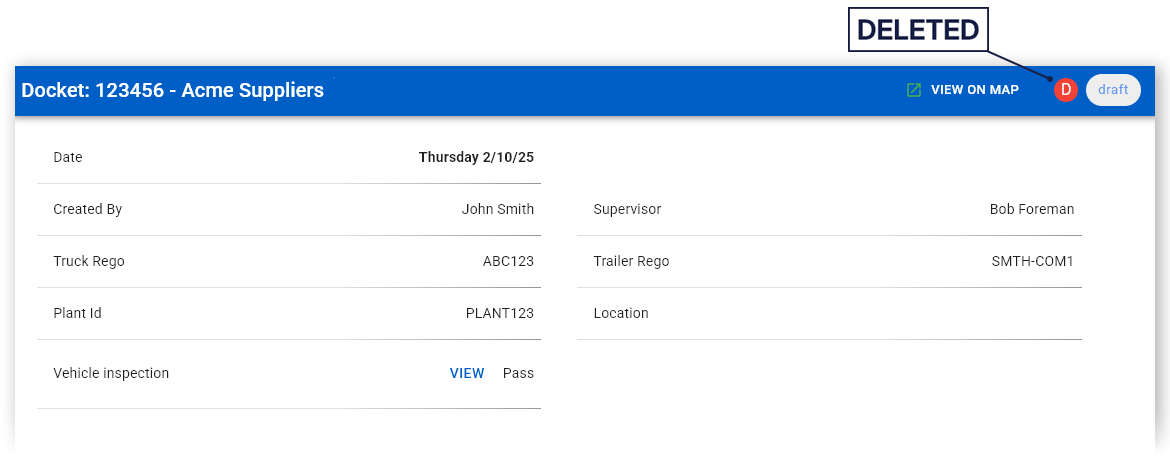
- Click Save. The Edit Docket dialog closes and the docket is deleted. If the deleted docket is reopened, the reason for the deletion provided here, and the person who deleted it, are shown at the top of the Edit Docket dialog.
Delete dockets in bulk
To delete several dockets in one action:
- Sign in to Virtual Superintendent.
- Click Menu > Super User. The Dockets page opens. You might be asked to choose a pre-filter setting before dockets are shown.
- Select the checkbox beside every docket you want to delete.
-
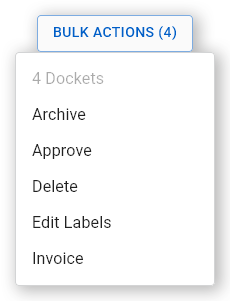
Click Bulk Actions. A contextual menu opens.
 Click or tap to expand image
 -
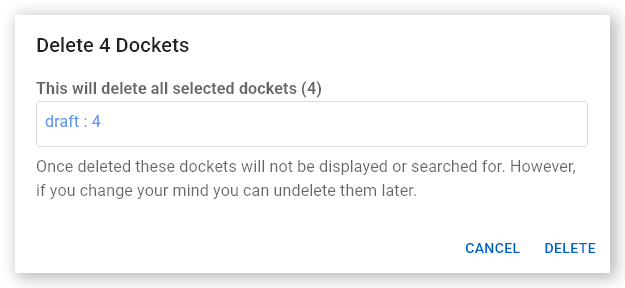
Click Delete. The Delete Dockets dialog opens, showing the total number of dockets that will be deleted and their docket states (for example, two draft and eight reconciled).
 Click or tap to expand image
 -
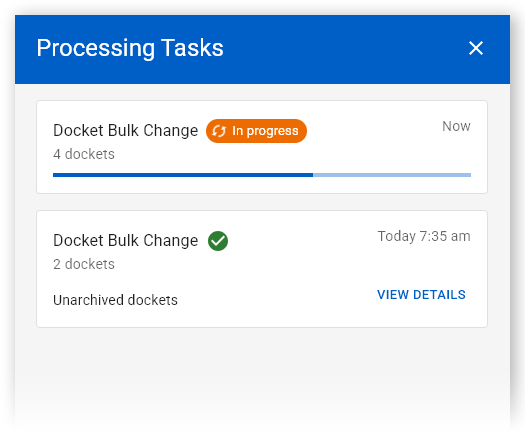
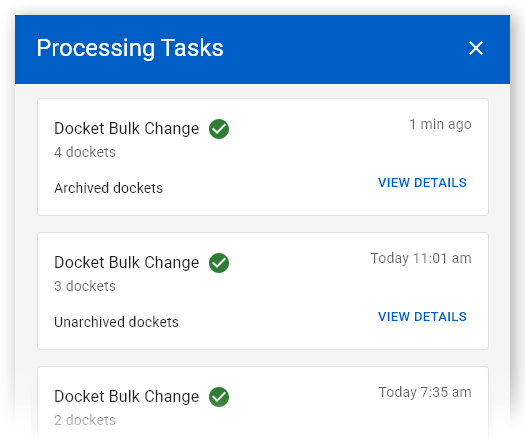
Click Delete. The Processing Tasks panel opens on the right side of the screen, and the dockets are deleted and no longer visible in default docket views and searches. Depending on the number of dockets being deleted, this process might take some time.
 Click or tap to expand image
The Processing Tasks panel is used to indicate that a background process has started.
While background tasks are underway, you can leave the Dockets page and work in other areas of Virtual Superintendent. If you have closed the Processing Tasks panel, when the background task finishes a notification is shown on the Processing Tasks icon in the top bar.

Click the Processing Tasks icon to reopen the Processing Tasks panel and see a list of all historical tasks with a timestamp indicating when they were completed. Click View Details beside the deleting task to open a dialog showing the unique IDs of the dockets that were deleted.
Restore Deleted Dockets
Restore deleted dockets individually
To individually restore deleted dockets:
- Sign in to Virtual Superintendent.
- Click Menu > Super User. The Dockets page opens. You might be asked to choose a pre-filter setting before dockets are shown.
-
Click Display Options. A contextual menu opens.
Click or tap to expand image - Click Show Deleted. The Deleted column filter updates to show only deleted dockets.
-
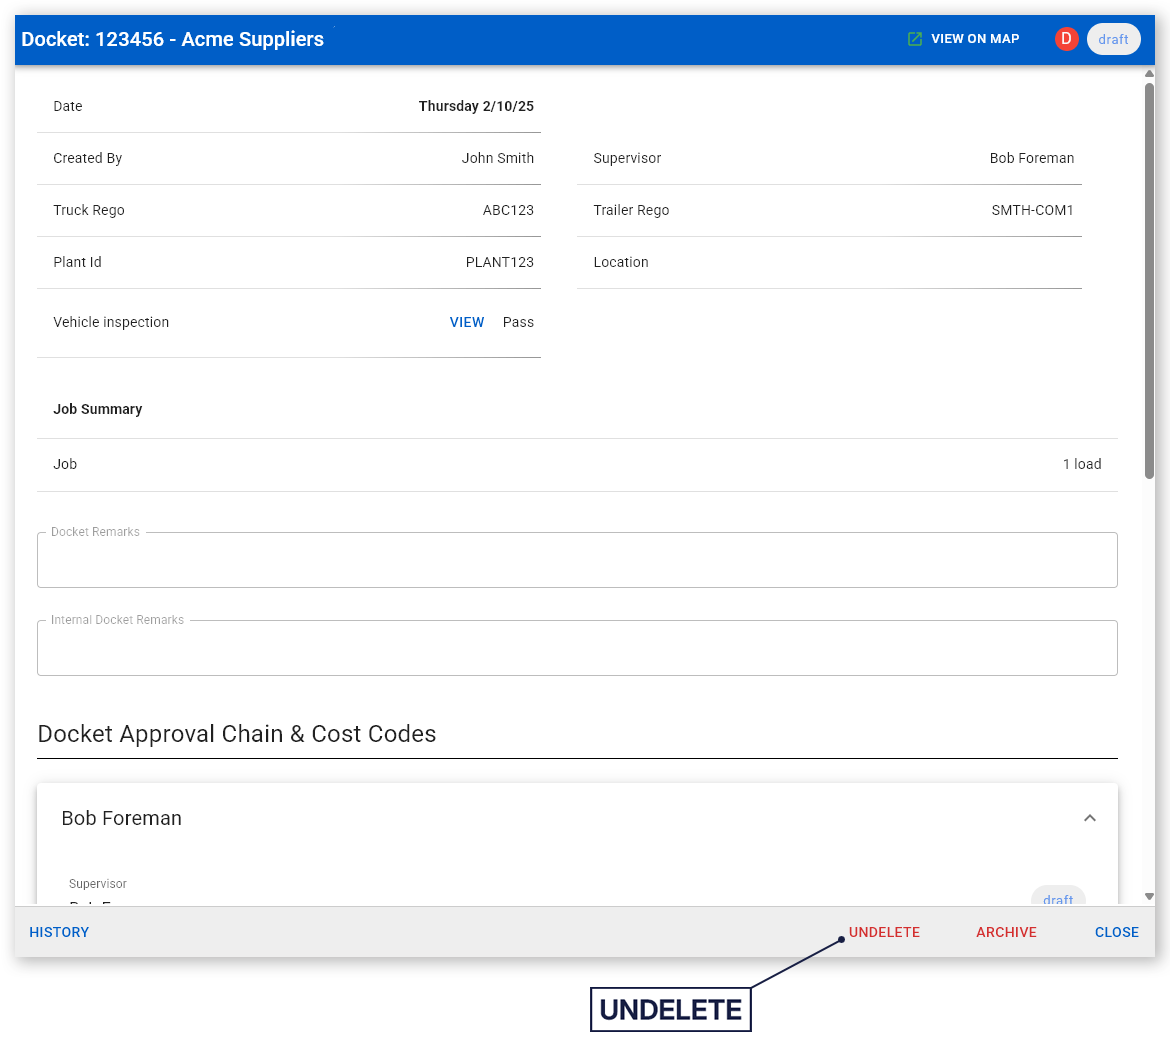
Select a deleted docket that you want to restore. The Edit Docket dialog opens.
 Click or tap to expand image
 - Click Undelete. The button changes to Confirm Undelete? and starts a three second countdown. When the countdown finishes, the button changes back to Undelete.
-
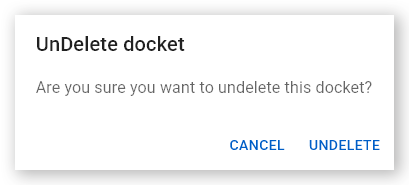
Click Confirm Undelete?. The Undelete Docket dialog opens.
 Click or tap to expand image
 - Click Undelete. The Edit Docket dialog closes and the docket is undeleted and restored to default docket views and searches.
Undeleted dockets in bulk
To undelete several dockets in one action:
- Sign in to Virtual Superintendent.
- Click Menu > Super User. The Dockets page opens. You might be asked to choose a pre-filter setting before dockets are shown.
-
Click Display Options. A contextual menu opens.
Click or tap to expand image - Click Show Deleted. The Deleted column filter updates to show only deleted dockets.
- Select the checkbox beside every docket you want to undelete.
-
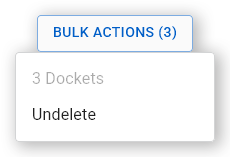
Click Bulk Actions. A contextual menu opens.
 Click or tap to expand image
 -
Click Undelete. The Undelete Dockets dialog opens, showing the total number of dockets that will be restored and their docket states (for example, one accepted and five approved).
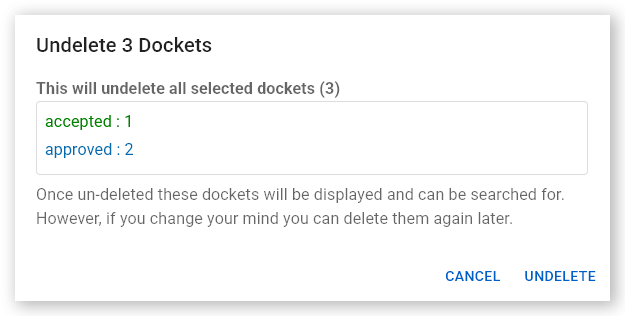 Click or tap to expand image
 -
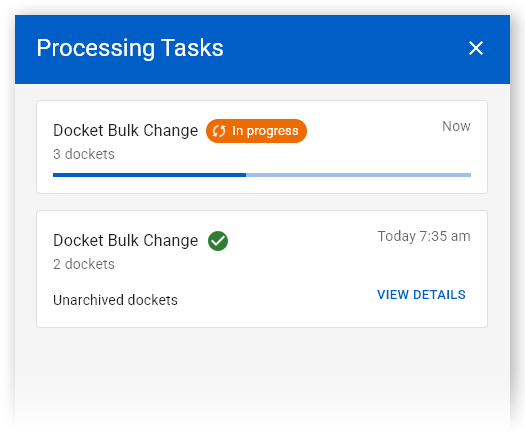
Click Undelete. The Processing Tasks panel opens on the right side of the screen, and the dockets are undeleted and restored to default docket views and searches. Depending on the number of dockets being undeleted, this process might take some time.
 Click or tap to expand image
The Processing Tasks panel is used to indicate that a background process has started.
While background tasks are underway, you can leave the Dockets page and work in other areas of Virtual Superintendent. If you have closed the Processing Tasks panel, when the background task finishes a notification is shown on the Processing Tasks icon in the top bar.
Click the Processing Tasks icon to reopen the Processing Tasks panel and see a list of all historical tasks with a timestamp indicating when they were completed. Click View Details beside the undeleting task to open a dialog showing the unique IDs of the dockets that were restored.