Create and Manage Geofences on the Map
This article explains how to create, edit, and manage geofences on your site map.
Geofences are electronic polygons used to define areas of interest on the map. They are typically used to track entry and exit activity, including loading and disposal events.
Geofences are created and managed from the Layers tab on the Maps page.
In this article
Permissions
To add and manage geofences or other elements on maps in Virtual Superintendent, you must have Map Editor permissions.
Create a New Geofence
To create a new geofence:
- Sign in to Virtual Superintendent.
- Click Menu > Maps. The Maps page opens.
-
Click the Edit (pencil) icon on the map toolbar to open the editing panel.
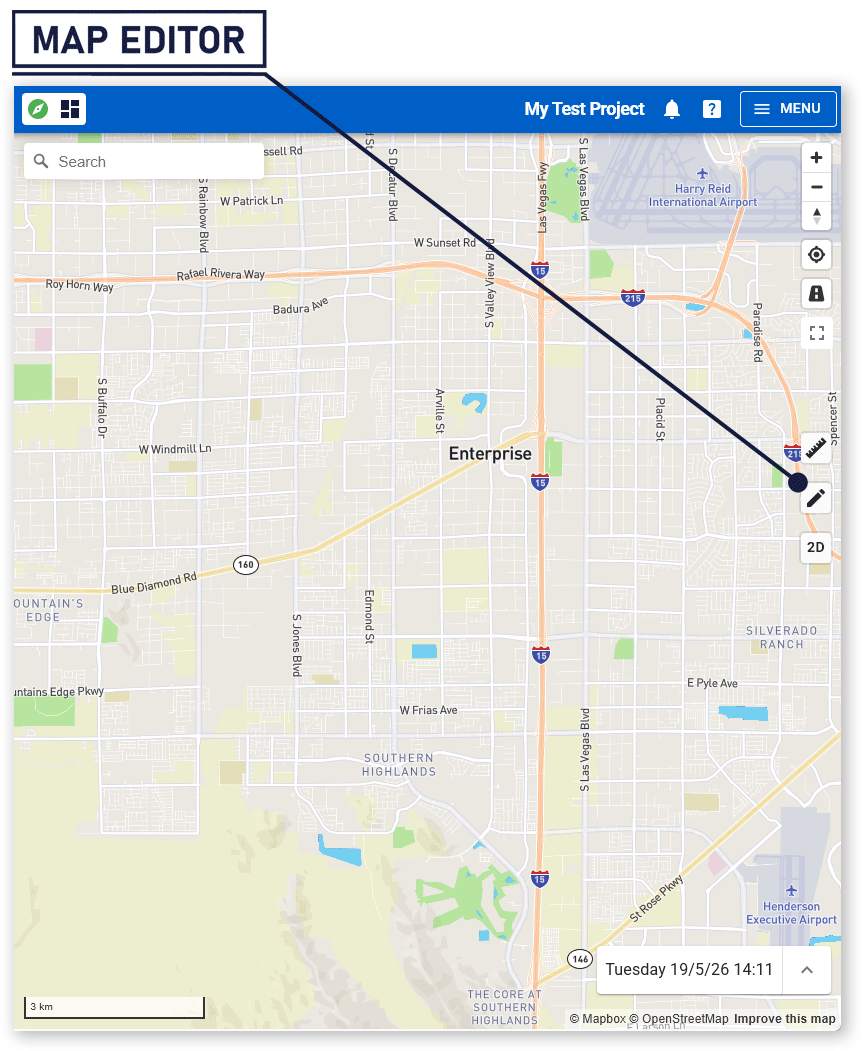 Click or tap to expand image
 -
Click the Draw Polygon icon at the top of the panel. The mouse cursor changes from a hand to a crosshair.
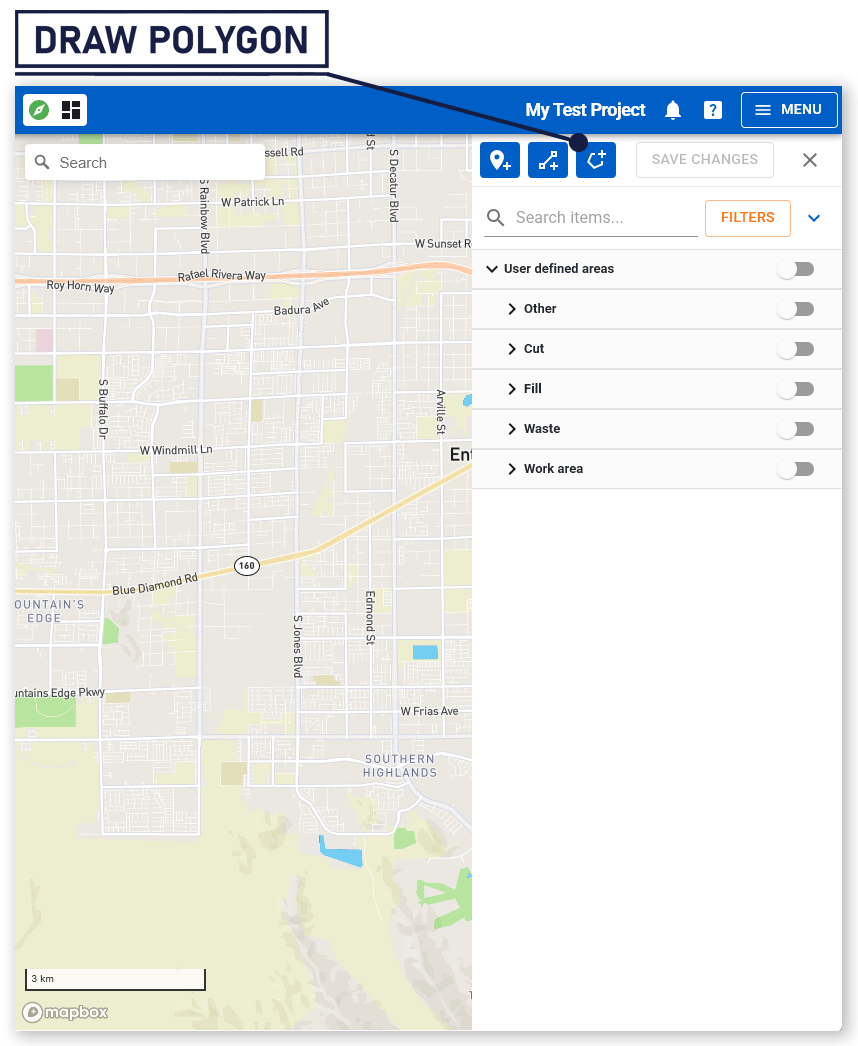 Click or tap to expand image
 -
Click on the map to place points that outline the geofence. Each click adds a point. Double-click to complete the shape. The Add New Polygon dialog opens:
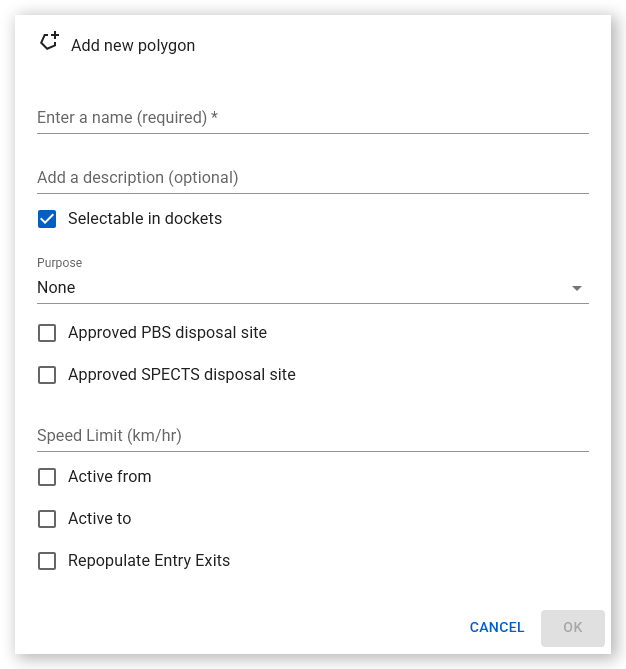 Click or tap to expand image
 - Complete the Add New Polygon dialog fields:
| Field | Description |
|
Name
|
Enter a unique name for the area. Required.
|
|
Description
|
Add a brief description
|
|
Selectable in dockets
|
Enable to allow this geofence to be selected as a location in dockets (enabled by default)
|
|
Purpose
|
Select the geofence’s purpose from the dropdown.
|
|
Approved PBS disposal site
|
Select if this is an approved PBS (Performance Based Standards) disposal site
|
|
Approved SPECTS disposal site
|
Select if this is an approved SPECTS (Safety, Productivity and Environment Construction Transport Scheme) disposal site
|
|
Speed Limit (km/hr)
|
Specify the maximum speed limit for the area in kilometers per hour
|
|
Active from
|
Set the date the geofence begins recording entry and exit data
|
|
Active to
|
Set the date the geofence stops recording entry and exit data. After this date, the geofence becomes Inactive and no longer records activity. |
|
Repopulate Entry Exits
|
Apply historical entry and exit data to the geofence
|
- Click OK.
- Click Save Changes in the editing panel. The geofence appears on the map.

Manage Existing Geofences
To edit, export, duplicate or archive an existing geofence:
- Sign in to Virtual Superintendent.
- Click Menu > Maps. The Maps page opens.
-
Click the Edit (pencil) icon on the map menu bar.
Click or tap to expand image -
Search for the geofence using the search field.
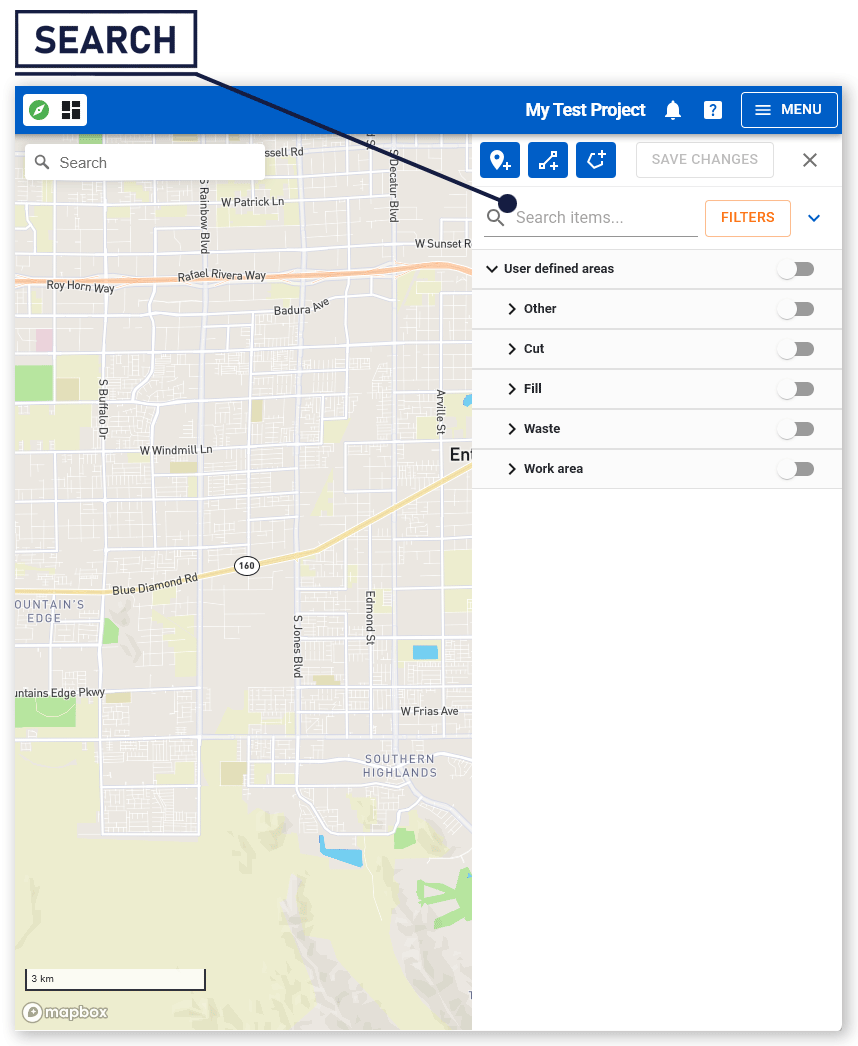 Click or tap to expand image
 -
Click the three-dot menu next to the geofence you want to work with and select an action:
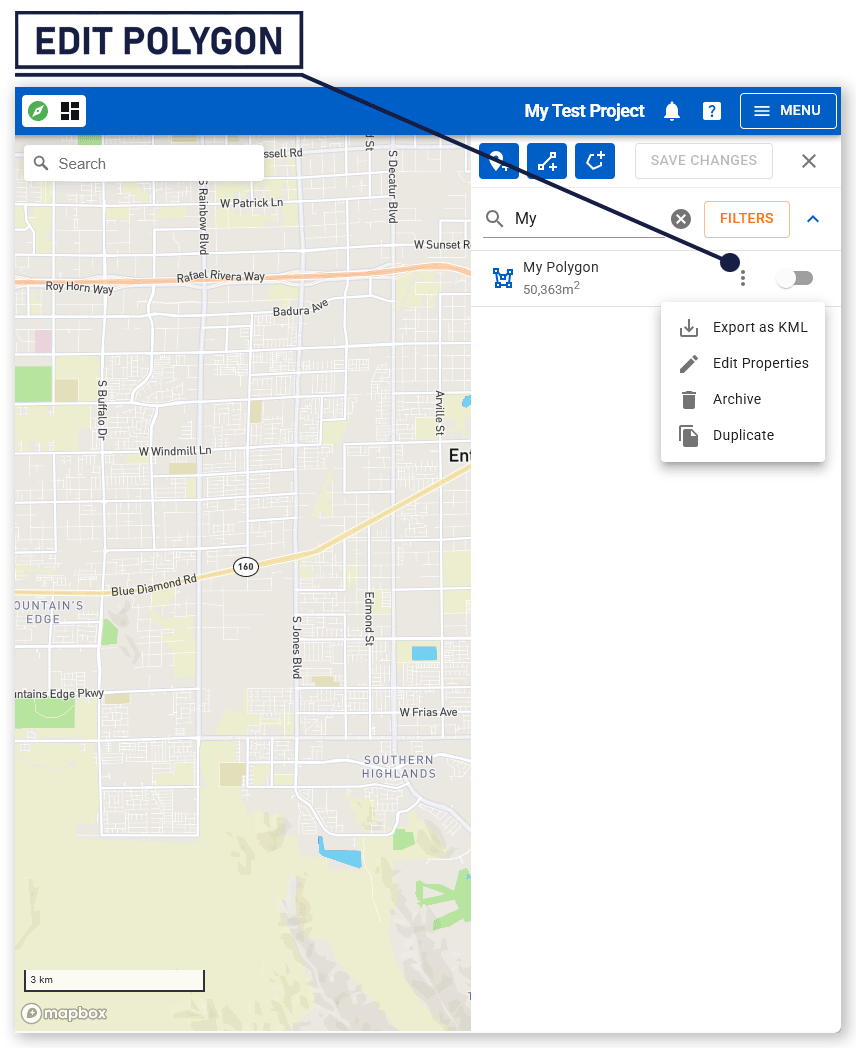 Click or tap to expand image
| Action | Description |
| Export as KML | Export the geofence data as a KML (Keyhole Markup Language) file |
| Edit Properties | Modify geofence details |
| Archive | Remove the geofence from the map and stop recording data. The view these later you must restore them. |
|
Duplicate
|
Create a draft copy of the geofence at the same location. Update the name and properties before saving by clicking OK.
|
- Click Save Changes to apply any geofence edits.
View Geofences on the Map
To view manually configured geofences:
- Sign in to Virtual Superintendent.
- Click Menu > Maps. The Maps page opens.
-
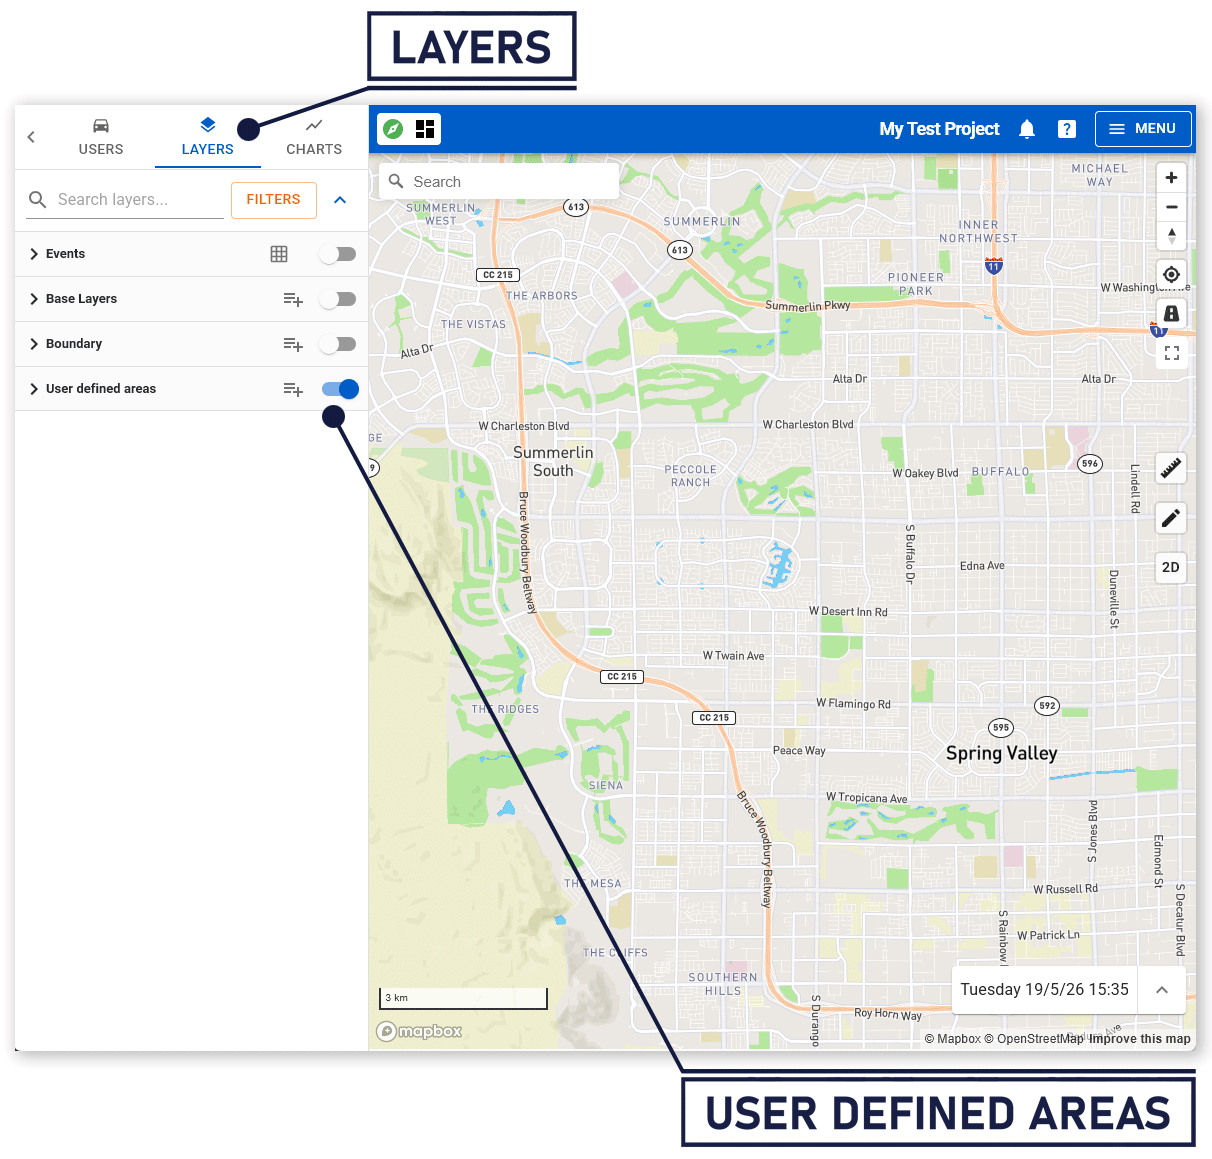
Open the Layers panel in the top left corner.
 Click or tap to expand image
 - Locate the User defined areas layer.
- Toggle the layer on to display all geofences.
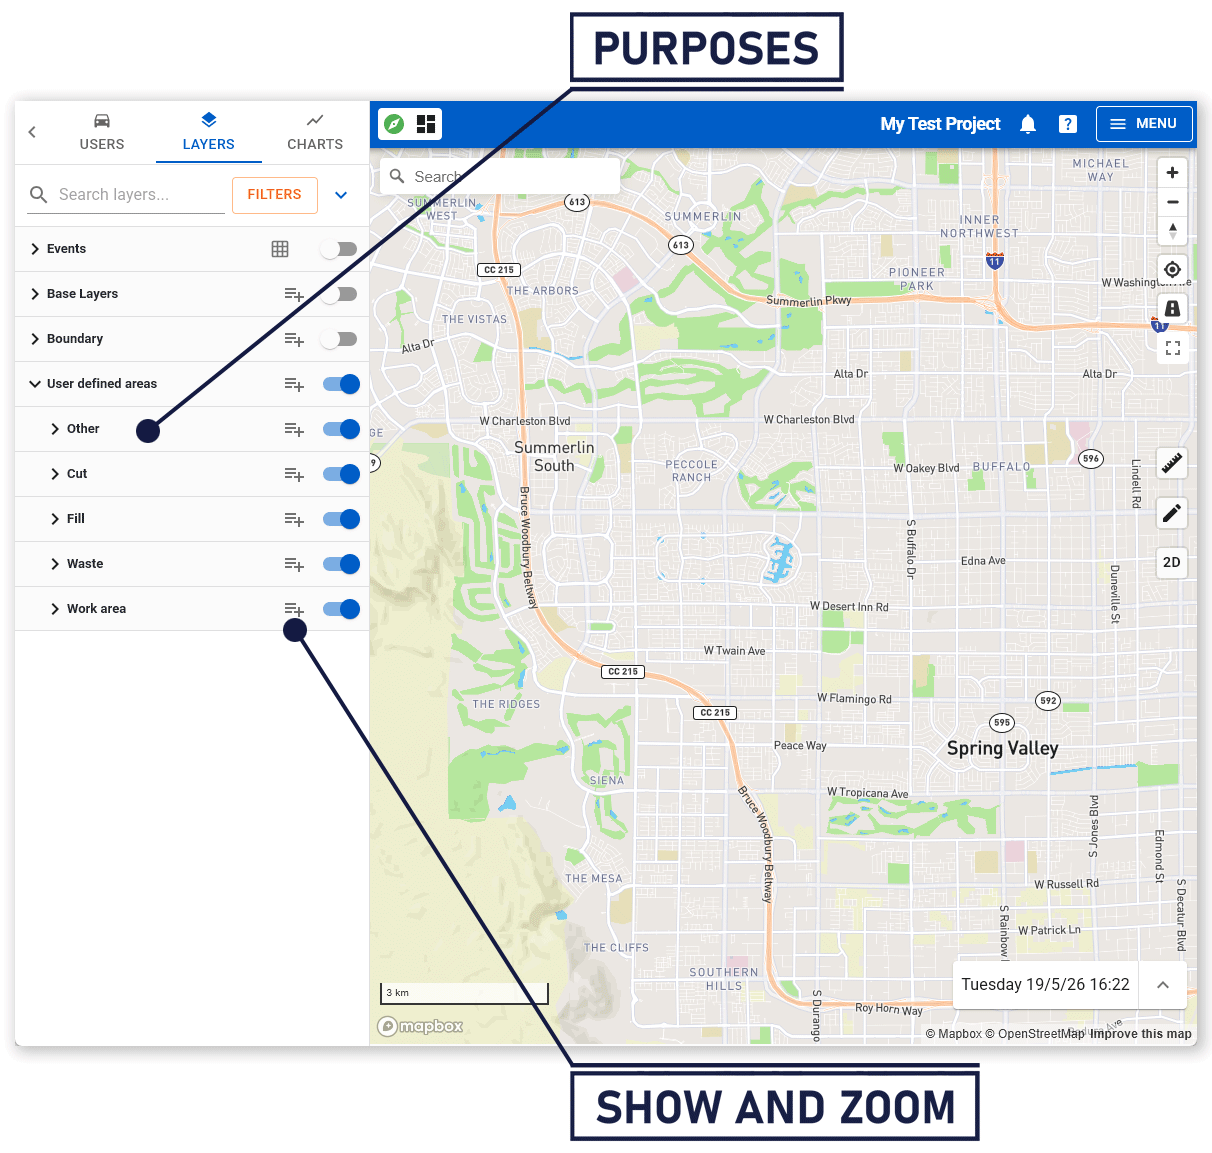
Geofences are grouped by Purpose under the User defined areas layer and can be toggled on or off individually or by group:
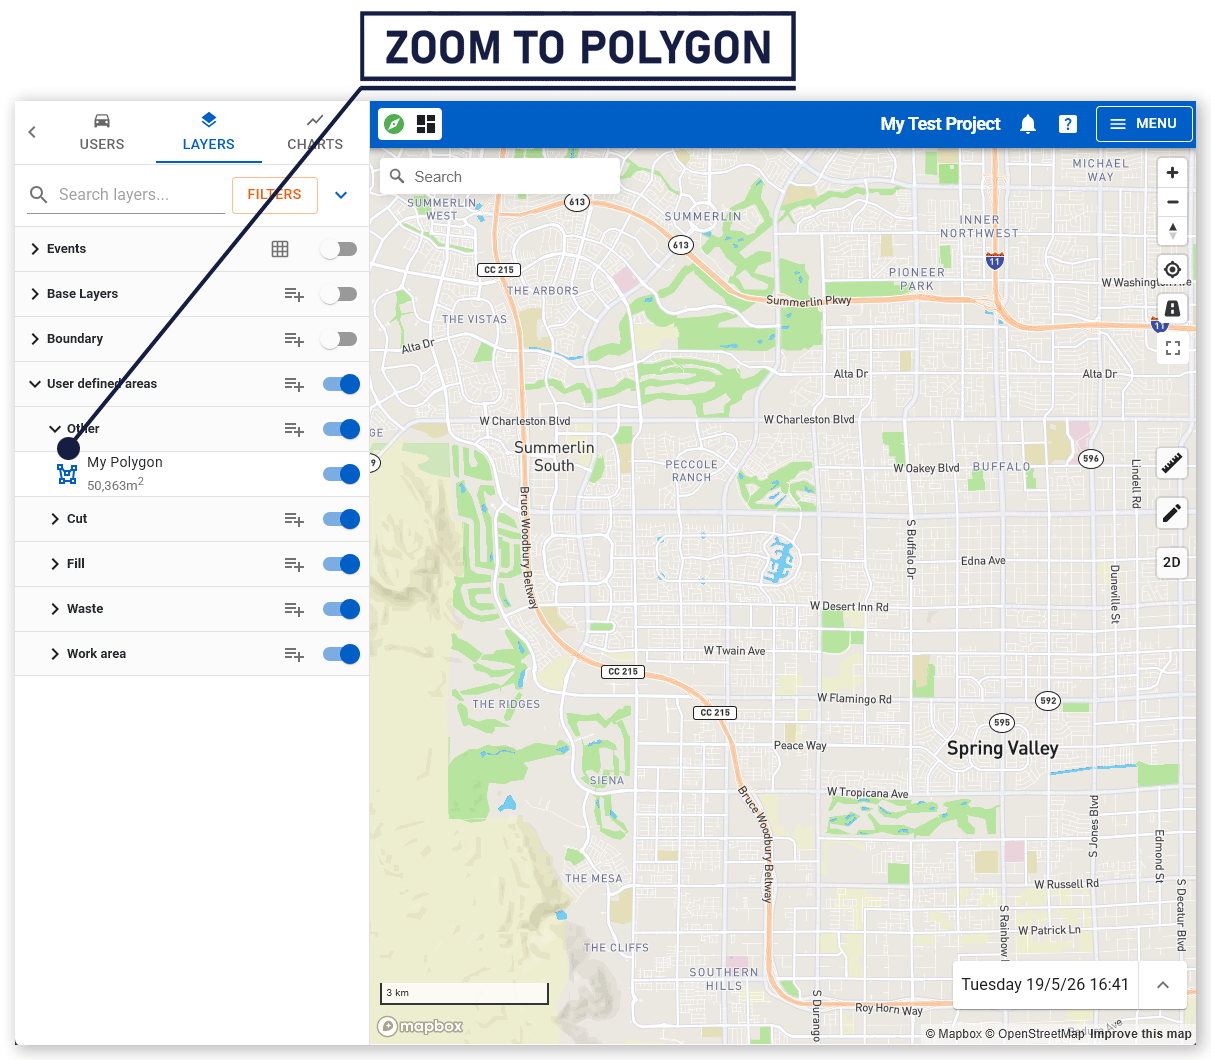
To focus on a geofence, click the polygon icon beside its name to zoom to its location on the map:
Filter Geofences by State
- Sign in to Virtual Superintendent.
- Click Menu > Maps. The Maps page opens.
-
Click the Edit (pencil) icon on the map menu bar.
Click or tap to expand image -
Click the Filters button and select one or more states.
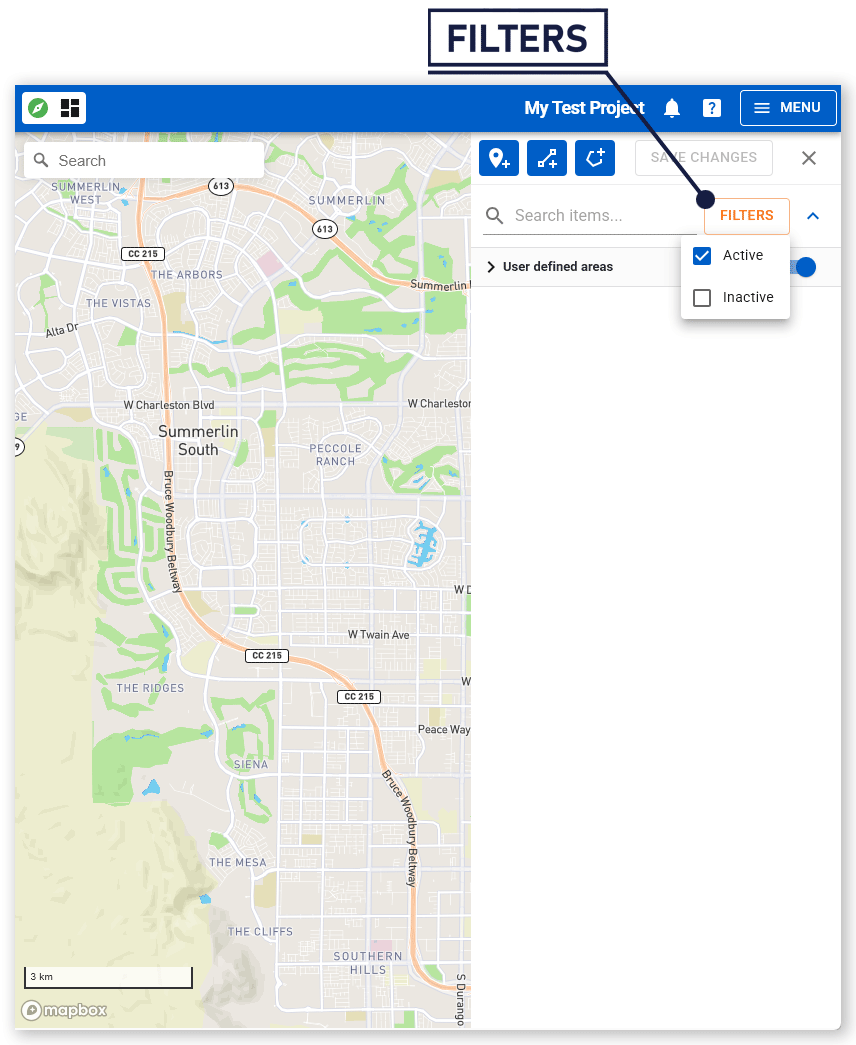 Click or tap to expand image
| State | Description |
| Active | Currently records data and can trigger alerts |
| Inactive | Visible on the map but no longer records data |
| Archived | Hidden from the map and inactive |
- The list updates to show only polygons matching the selected states.
Note: For more details about the Maps page, including the Users, Layers, and Charts tabs, refer to the Virtual Superintendent Map Features help article.