
Simple Operator Timesheets
Simple Operator Timesheets let machine operators record their working hours in SafeSite using a simplified on-screen timesheet. Once configured, SafeSite automatically generates labor dockets in Virtual Superintendent for these operators with key information pre-filled.
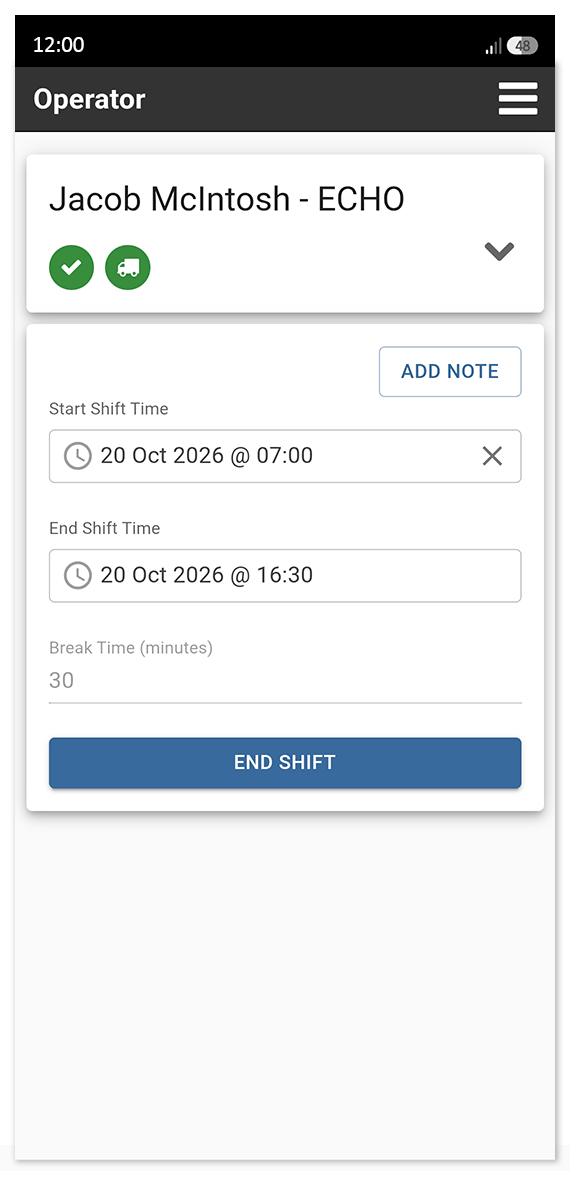
Operators can use this feature on their personal devices, but it's designed primarily for shared devices configured as SafeSite Docket Stations in Machine Mode. These devices are installed in machines, allowing operators to create a timesheet or resume an existing timesheet when moving between machines during a shift.
To use this feature, SafeSite administrators need to:
- Configure a new or existing supplier to support simple timesheets
- Create an Operator Timesheet sign-on profile
- Assign the sign-on profile to an Operator Timesheet item code
- Configure SafeSite user accounts to use the Operator Timesheet item code
Note: Before you begin, contact support@virtualsuper.com to enable the Simple Operator Timesheets feature in your project.
In this article
Permissions
To access the Suppliers page (Menu > Suppliers), the Dockets Setup page (Menu > Dockets Setup), and the Users page (Menu > Users), you must have the following permissions:
- Admin Manager
- User Admin
Step 1. Create or Configure a Supplier
To create or configure a supplier for the Simple Operator Timesheets workflow:
- Sign in to Virtual Superintendent.
- Click Menu > Suppliers. The Suppliers page opens.
-
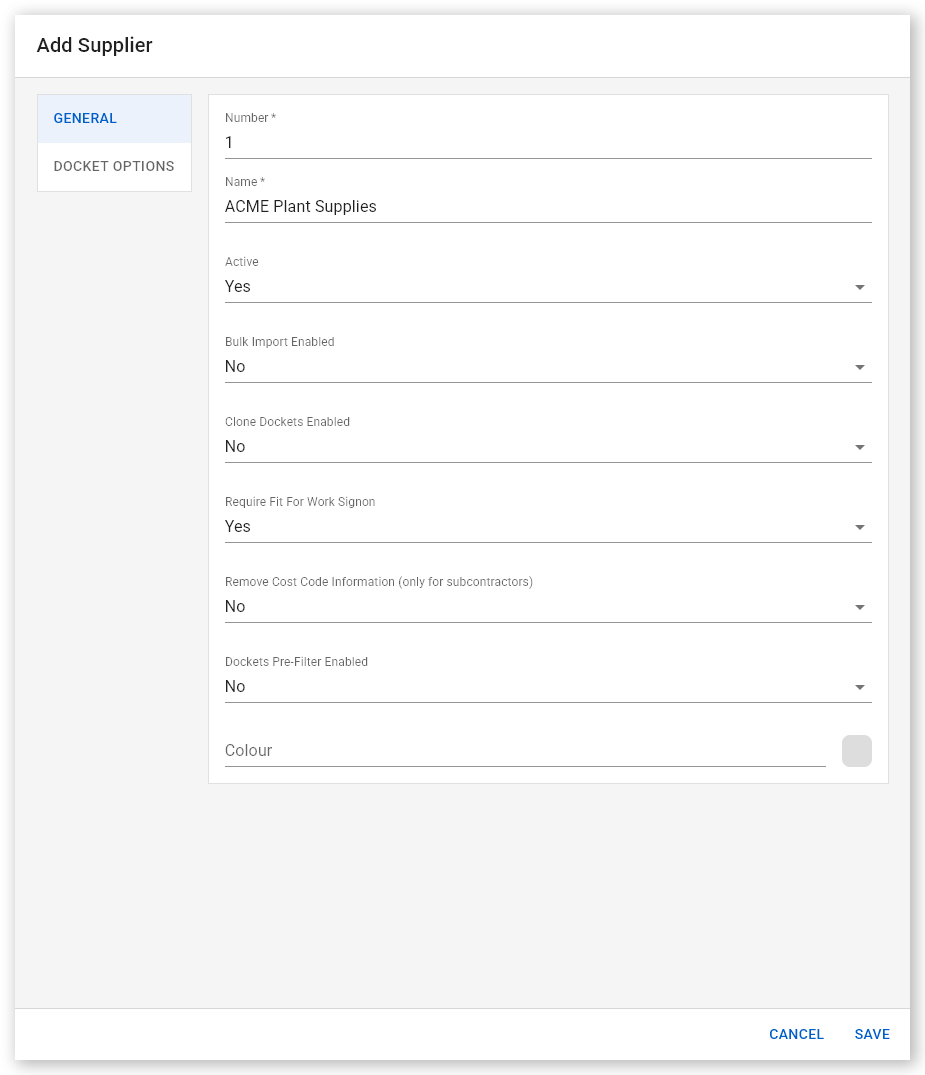
Click Add Supplier. The Add Supplier dialog opens.
 Click or tap to expand image
- Type a unique supplier ID number into the Number field.
- Type the supplier name into the Name field.
- Configure any other fields needed. See the Supplier Page help article for details about options on this dialog.
-
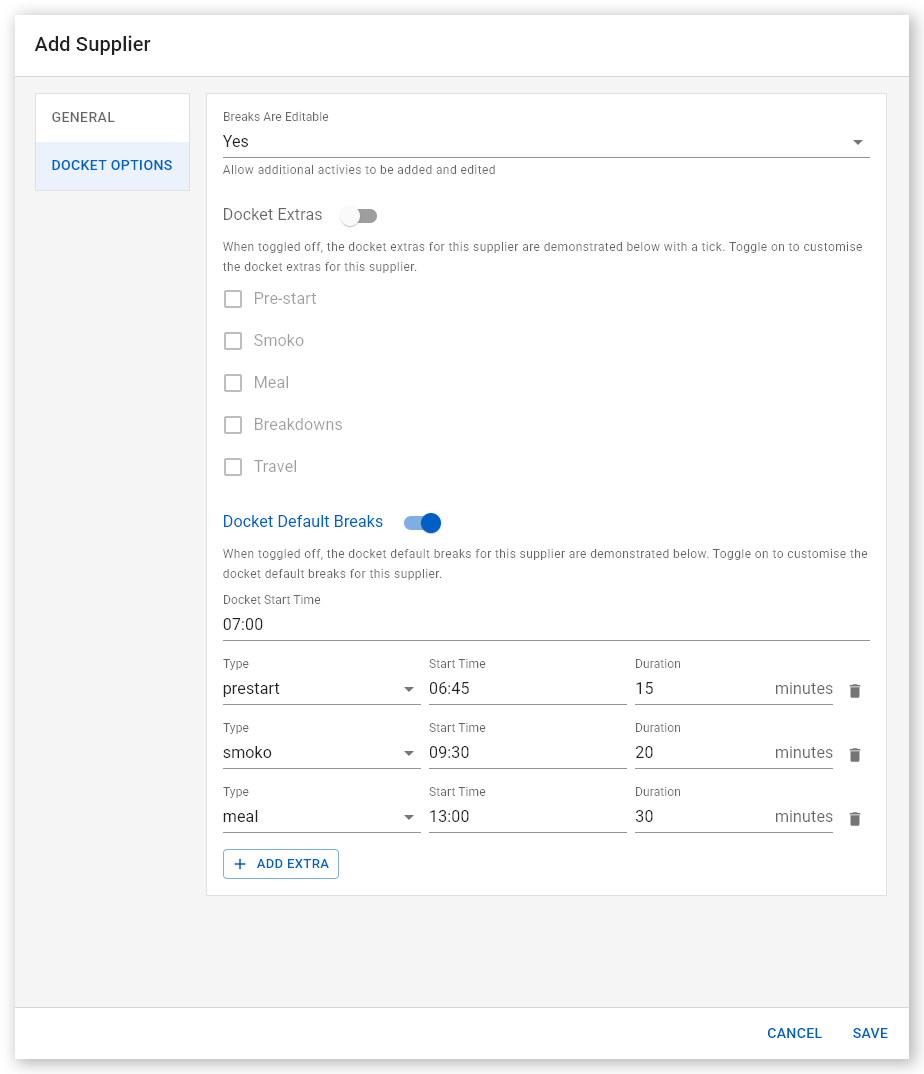
Click the Docket Options tab.
 Click or tap to expand image
- Enable the Docket Default Breaks toggle. Default breaks are automatically added to the bottom of the page.
-
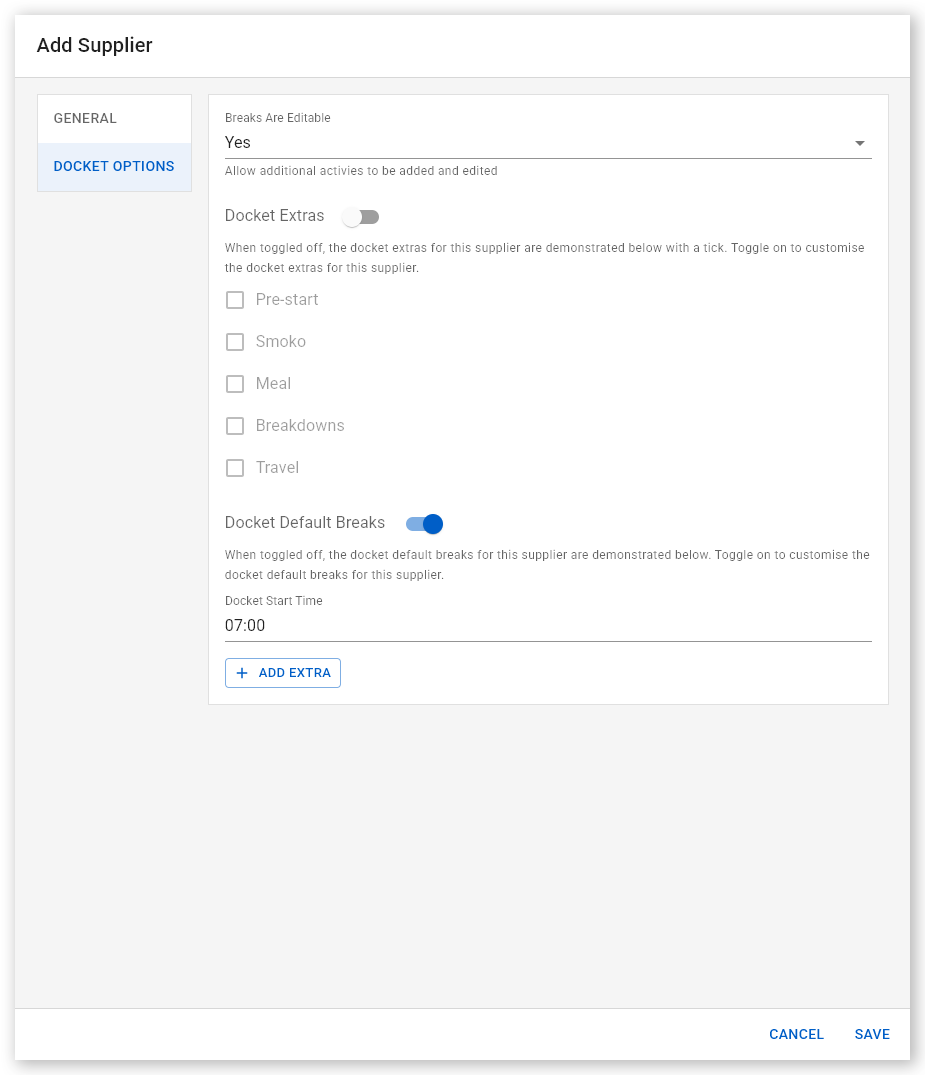
Delete all of the breaks that were just added by clicking the Delete icons.
 Click or tap to expand image
- Click Save. The supplier is added to the list.
Note: The Docket Start Time setting is not used by Simple Operator Timesheets.
Step 2. Create an Operator Timesheet Sign-on Profile
To create a Simple Operator Timesheets sign-on profile:
- Sign in to Virtual Superintendent.
- Click Menu > Dockets Setup. The Dockets Setup page opens.
- Click the Sign-on Profiles tab.
-
Click Add Sign-on Profile. The Add Sign-on Profile dialog opens.
 Click or tap to expand image
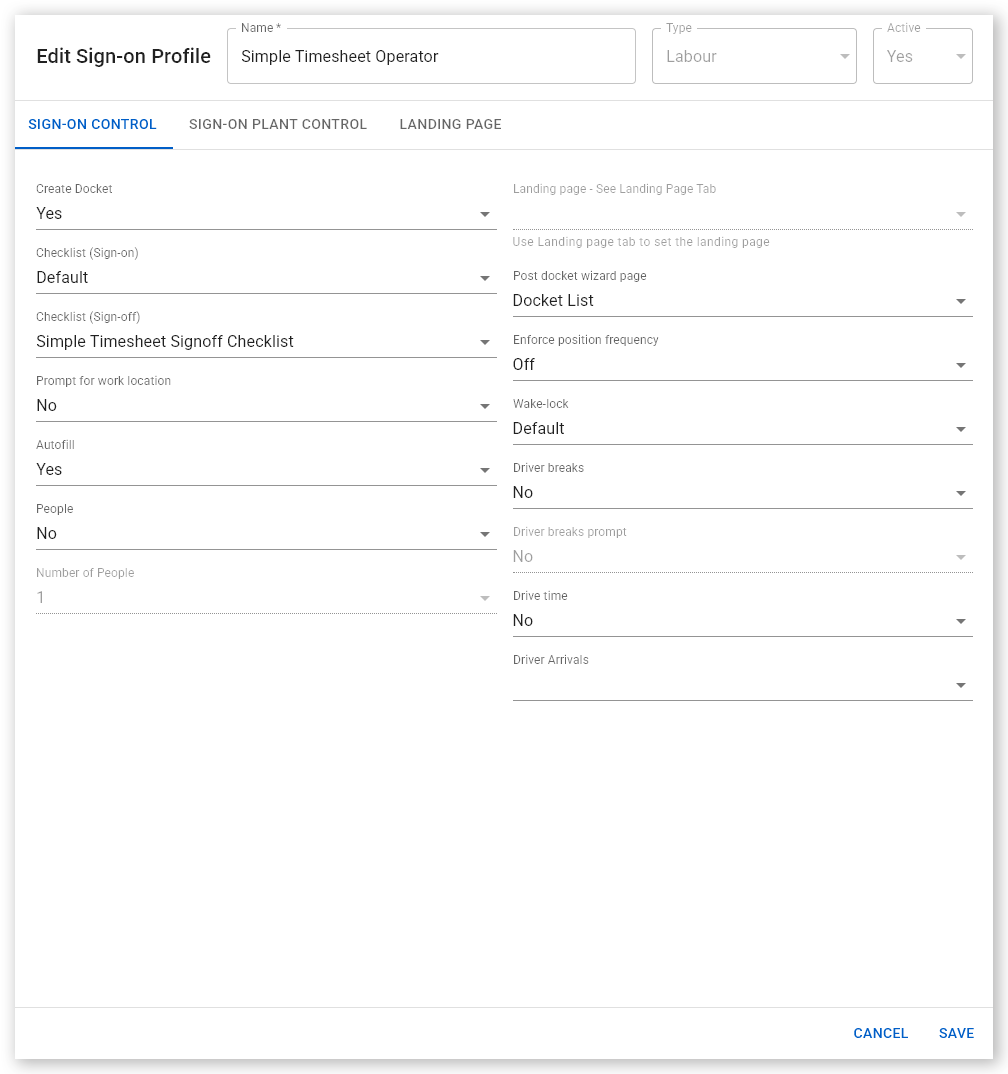
- Enter a unique profile Name.
- Type a suitable sign-on profile name into the Name field. For example, "Simple Timesheet Operator".
- Open the Type dropdown and select Labor.
- Open the Create Docket dropdown and select Yes.
-
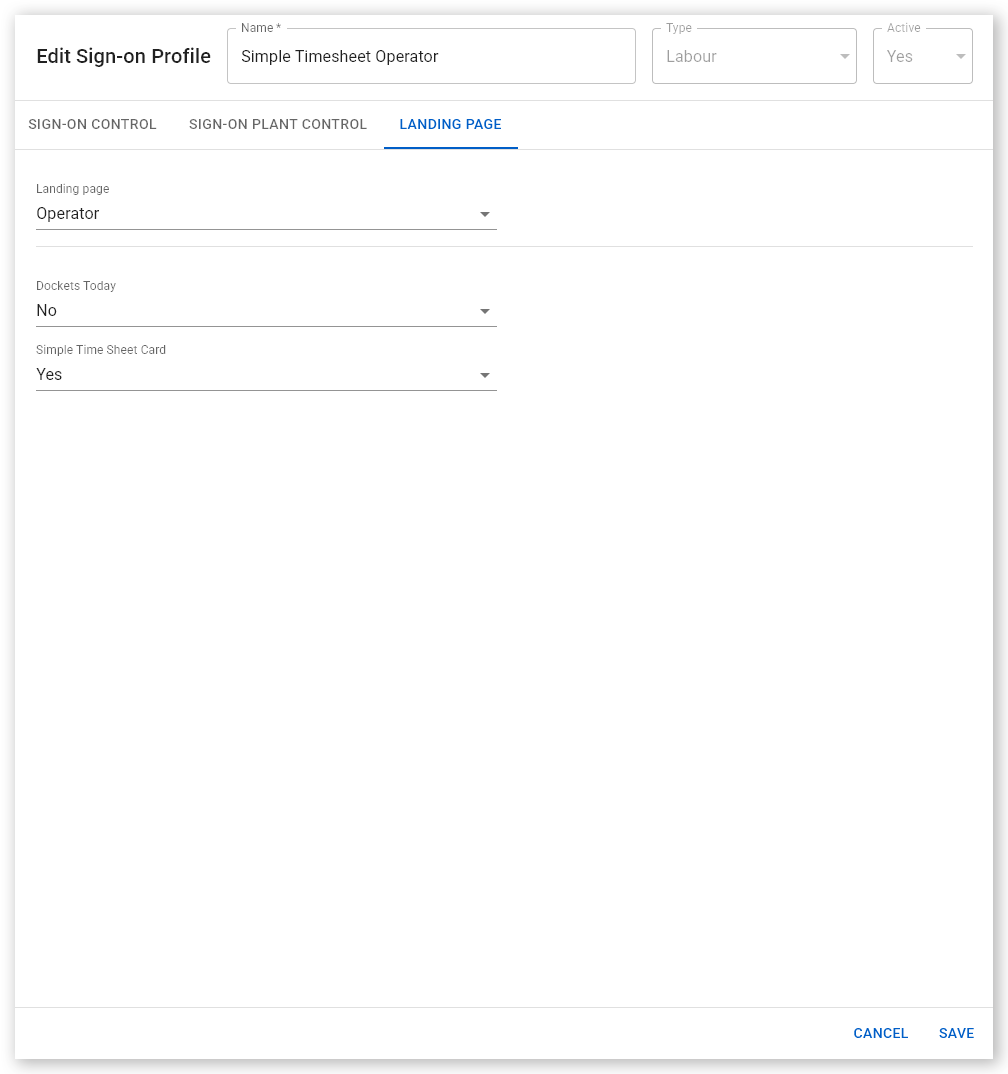
Click the Landing Page tab.
 Click or tap to expand image
- Open the Landing Page dropdown and select Operator.
- Open the Dockets Today dropdown and select No.
- Open the Simple Time Sheet Card dropdown and select Yes.
- Click Save. The new sign-on profile is saved. You can now assign it to one or more item codes.
The Dockets Today and Simple Time Sheet Card menus can only be enabled by Virtual Superintendent support. Contact support@virtualsuper.com to request these options.
Note: See the Sign-on Profiles Explained help article for detailed information about configuring sign-on profiles.
Step 3. Create Operator Timesheet Item Codes
To assign your new Operator Timesheet sign-on profile to an item code:
- Sign in to Virtual Superintendent.
- Click Menu > Dockets Setup. The Dockets Setup page opens.
- Click the Item Codes tab.
-
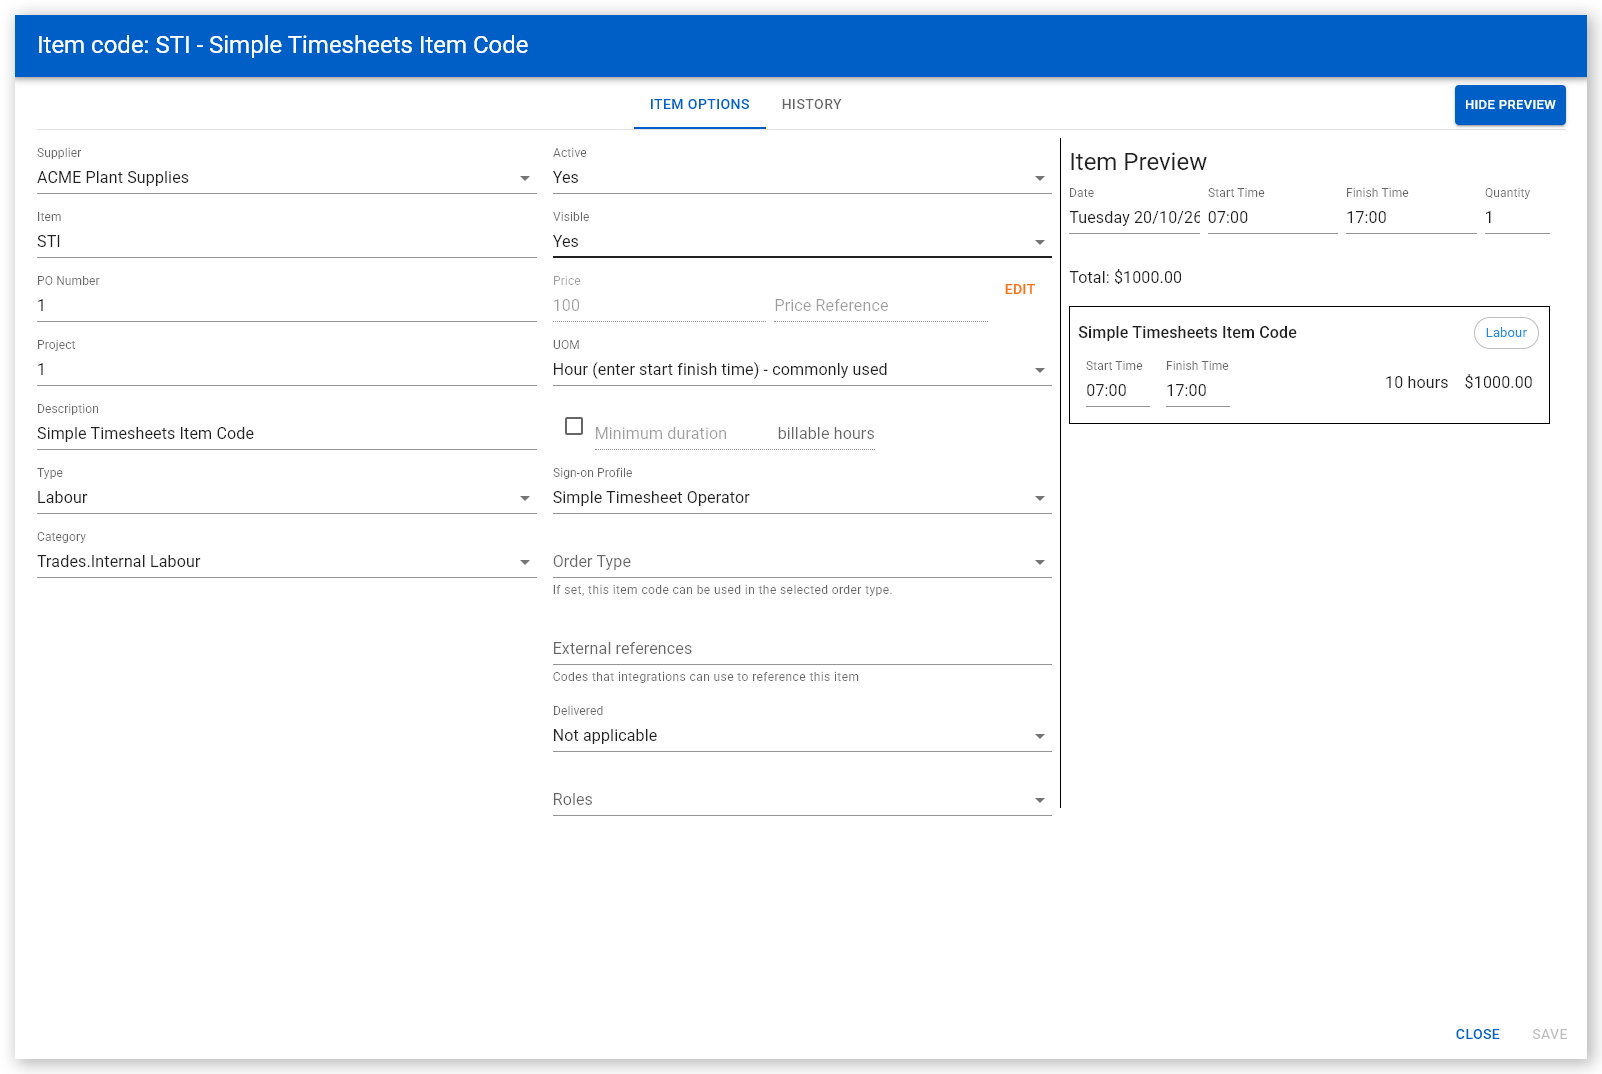
Select an item code from the list. The Edit Item Code dialog opens.
 Click or tap to expand image
- Open the Sign-on Profile dropdown and select your new sign-on profile.
- Open the UOM dropdown and select Hours.
- Click Save. The item code is updated to use the new sign-on profile.
You can create multiple Operator Timesheet item codes, but each operator must be assigned only one.
Step 4. Configure SafeSite Users as Timesheet Operators
Create or update each operator's SafeSite account with the following permissions and settings:
- Sign in to Virtual Superintendent.
- Click Menu > Users. The Users page opens.
- Click SafeSite App Users in the top menu bar. A grid view opens, showing all SafeSite users in your project and their permissions.
- Locate the user account you want to edit. Use the Name filter in the top left corner to filter by user name or the Email field to filter by email address.
- Select the required SafeSite user account. The User Permissions dialog opens.
- Enable the Docket Contractor toggle.
- Click the field next to Docket Contractor and select the supplier configured to support Operator Timesheets.
- Assign one Operator Timesheet item code to the user from the Item Codes dropdown.
- Disable to Timesheets permission toggle, if present.
- Click Save to update the user's permissions and close the dialog.
Important: The SafeSite Timesheets permission is used for a different process. Do not enable it for Simple Operator Timesheets.
Note: If your operators will use a shared device installed in a machine, you should now register the device as a SafeSite Docket Station in Machine Mode and link it to the relevant machine. See Register a Device as a Docket Station for more information about the setup process.
How Operators Create a Simple Timesheet
Use this process when working as an operator on the same machine throughout a shift.
- Sign on to SafeSite app.
- Complete your Fit for Work checklist, then tap Next.
- Select the machine you will use on your shift, complete your Machine checklist, take a photo of the machine, then tap Next.
-
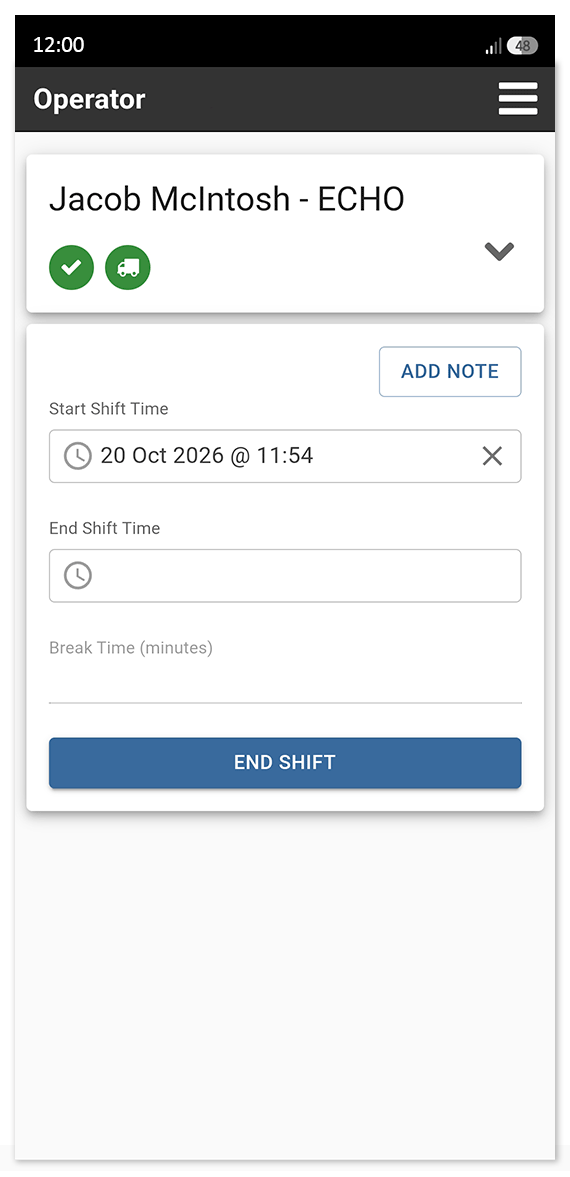
Select your supervisor, then tap Next. The Operator home screen opens, showing the Simple Timesheet panel.
 Click or tap to expand image
-
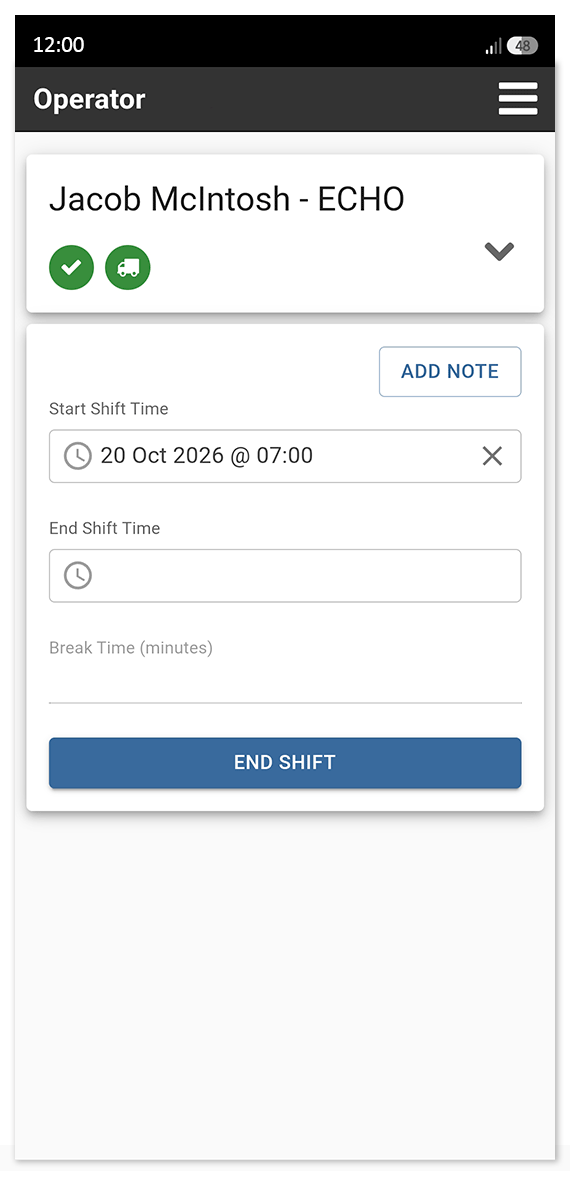
Tap Start Shift Time and set the time your shift starts. Begin your shift.
 Click or tap to expand image
-
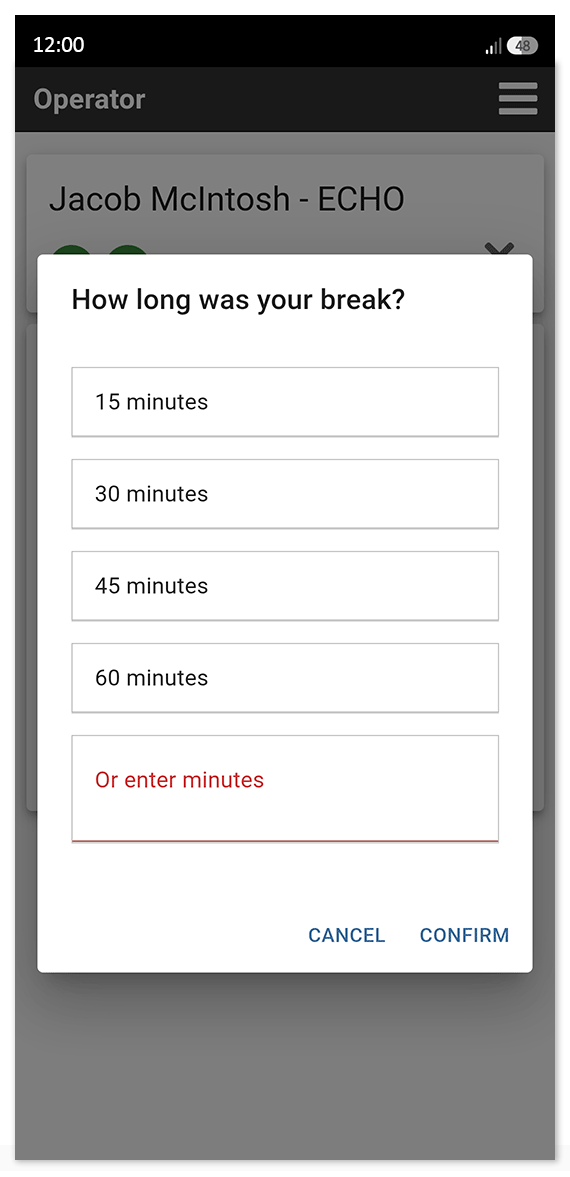
Tap Break Time when you take a break and select the break duration (shown in 15 minutes increments or entered manually).
 Click or tap to expand image
-
At the end of your shift, tap End Shift Time and set the shift end time. You can also tap Add Note to add notes about the shift, any problems you encountered, or anything of importance that you want your supervisor to know.
Click or tap to expand image -
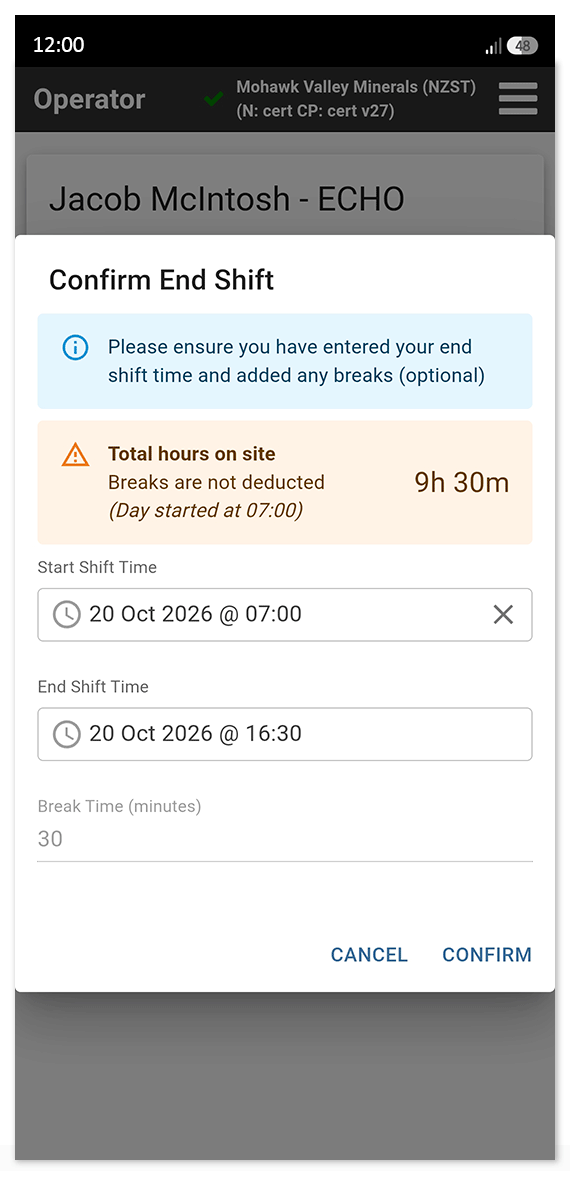
Tap End Shift and review the details you entered, then tap Confirm. You are signed out and returned to the sign-in screen.
 Click or tap to expand image
When you sign on, SafeSite automatically creates a docket with a status of Draft. When you sign off, the docket status changes to Submitted and the docket is ready to be processed by your supervisor.
You can also resume the same timesheet, putting it back into Draft status, if you start working on another machine, as described below.
Resume a Simple Operator Timesheet
If you move between machines during a shift, you can resume your existing timesheet rather than create a separate docket for each machine.
- Sign off from the current machine.
- Go to the shared Docket Station installed in the next machine.
- Tap Record Timesheet.
- Select your name from the Select User screen. The Resume Timesheet? screen opens.
- Tap Yes to resume your existing timesheet.
- Continue recording your working time.
- Sign off when you finish working on the machine.
When you first sign off, the docket status changes from Draft to Submitted.
If you resume the timesheet, the same docket returns to Draft status. When you sign off again, its status changes back to Submitted.
This allows you to record your work across multiple machines in a single docket.